How To Setup Jenkins Server on Kubernetes - Master Slave Setup
Jenkins is the most commonly used and popular open-source CI/CD tool used by many famous companies worldwide. We don’t need to have a second thought of it since the biggest companies like Facebook, Udemy, NetFlix, LinkedIn and many more companies using Jenkins with confidence.
When your Jenkins running on the traditional method (on a VM, bare metal server, single container) code base growing accordingly and your code build jobs increase, You also might be running numerous build jobs in parallel. This will lead to redundant resource utilizations and slowness of your delivery pipelines and build/deploy jobs.
How to Setup Jenkins on Kubernetes with Scalable Master Slave Setup
So, Is there any way to overcome this slowness?
Yes, For sure… Here’s the way.
This tutorial will walk you through the setup scalable Jenkins server on the Kubernetes cluster using a set of Kubernetes deployment manifest YAML. The use of Kubernetes YAML files will help you track, edit, modify changes and reuse deployments as much as you want.
Jenkins Scalability:
Scalability can be defined as the system’s ability to expand its capabilities to handle an additional load as required.
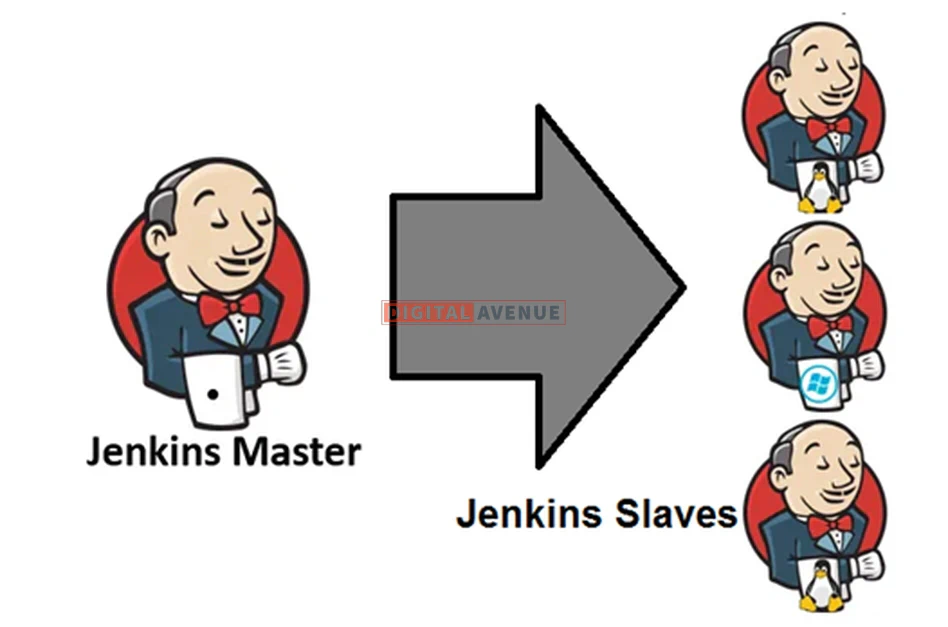
Jenkins scaling is based on the Master-Slave model. This means You will have several Jenkins agent instances (Salves) and one Master Jenkins instance responsible for distributing jobs among Jenkins slaves. Jenkins Slaves were doing the jobs when Jenkins Master triggered the build/deploy pipeline.
Sounds great! Right?
Have a look at this image, and it will feed more idea into your mind.
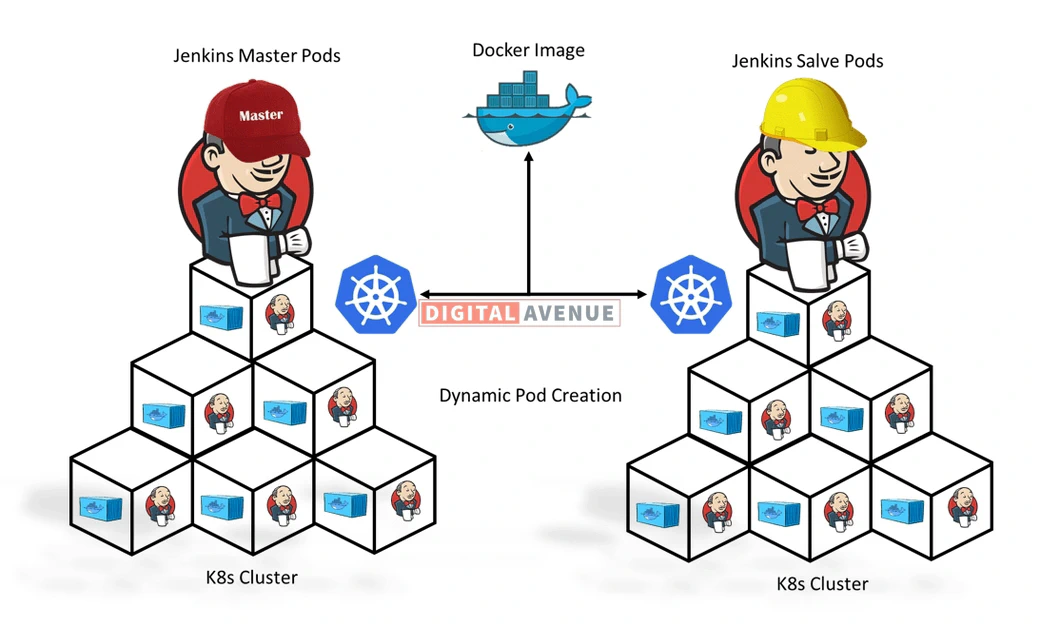
You Got Benefits !!!
- Multi-Tasking: You can run many more build jobs in parallel
- Self-Healing: Replacing corrupted Jenkins instances automatically.
- Cost Saving: Spinning up and removing slaves dynamically based on need.
- Even Load Distribution: Spreading the load across different physical machines/ VMs / Nodes when required.
By spinning up Jenkins on Kubernetes, you will get the power of infinity stones of the Kubernetes. :)
STEP 01: Create a Namespace for the Jenkins Deployment
Kubernetes namespace provides an additional layer of isolation for your Jenkins deployment. It allows you more control over the CI/CD environment.
Create a file named with Jenkins-ns. yaml and define your namespace name here.
vim jenkins-ns.yaml
apiVersion: v1
kind: Namespace
metadata:
  name: jenkins
Apply changes to the Kubernetes cluster
kubectl apply -f jenkins-ns.yaml
Use the following command to list all existing namespaces

STEP 02: Create Persistent Volume
Creating a persistence volume is essential since all of your Jenkins jobs, plugins, configurations should be persisted. If one pod dies, then another new pod can continue with persistent data from your volume.
Ok, Then Let’s create a Persistent Volume
Create a new file named with “jenkins-pv.yaml” and paste the below content into your file.
vim jenkins-deployment.yaml
apiVersion: v1
kind: PersistentVolume
metadata:
  name: jenkins-home-pv
  namespace: jenkins
  labels:
    usage: jenkins-shared-deployement
spec:
  storageClassName:  default # managed-premium
  capacity:
    storage: 5Gi # Change Me
  accessModes:
    - ReadWriteOnce
  persistentVolumeReclaimPolicy: Retain
  hostPath:
    path: "/var/jenkins_home"
Let’s apply the change to the Kubernetes cluster. (Make sure to append the “-n jenkins” option)
kubectl apply -f jenkins-pv.yaml -n jenkins

STEP 03: Create a PersistentVolumeClaim
“PersistentVolumeClaim” request for storage with a specific size and access mode. In this case, I’m going to claim 5GB of storage to my “Jenkins_Home.”
Now, Create another file named “jenkins-pvc.yaml” and paste the below content.
Note: Make sure to match the selector labels If you plan to change the manifest as you like. (Ex: usage: Jenkins-shared-deployment)
apiVersion: v1
kind: PersistentVolumeClaim
metadata:
  name: jenkins-home-pvc
  namespace: jenkins
  labels:
    app: jenkins
spec:
  accessModes:
  - ReadWriteOnce
  storageClassName: default # managed-premium
  resources:
    requests:
      storage: 5Gi # Change Me
Then, apply changes to the cluster.
kubectl apply -f jenkins-pvc.yaml -n jenkins

STEP 04: Create a Deployment Manifest
Here, I’m using Jenkins LTS docker image and expose port 8080 for the web access and port 50000 for the Jenkins JNLP service, which use to access Jenkins workers, respectively.
Let’s create a Kubernetes deployment manifest for the Jenkins server. Here I’m using Jenkins LTS image and exposing port number 8080 and 50000 for web access and inter master agent communications.
Now, create a file named “jenkins-deployemt.yaml” and paste the below content.
apiVersion: apps/v1
kind: Deployment
metadata:
  name: jenkins-master
  namespace: jenkins
  labels:
    app: jenkins
spec:
  replicas: 1
  strategy:
    type: RollingUpdate
    rollingUpdate:
      maxSurge: 1
      maxUnavailable: 1
  selector:
    matchLabels:
      app: jenkins
  template:
    metadata:
      labels:
        app: jenkins
    spec:
      securityContext: # Set runAsUser to 1000 to let Jenkins run as non-root user 'jenkins' which exists in 'jenkins/jenkins' docker image.
        runAsUser: 0
        fsGroup: 1000
      containers:
      - name: jenkins-master
        # https://github.com/jenkinsci/docker
        image: jenkins/jenkins:lts #jenkinsci/jenkins:2.150.1
        imagePullPolicy: IfNotPresent
        env:
        - name: JENKINS_HOME
          value: /var/jenkins_home
        - name: JAVA_OPTS
          value: -Djenkins.install.runSetupWizard=false
        - name: JAVA_OPTS
          value: "-Xmx8192m"
        # - name: COPY_REFERENCE_FILE_LOG
        #   value: $JENKINS_HOME/copy_reference_file.log
        ports:
        - name: jenkins-port # Access Port for UI
          containerPort: 8080
        - name: jnlp-port # Inter agent communication via docker daemon
          containerPort: 50000
        resources: # Resource limitations
          requests:
            memory: "256Mi" # Change Me
            cpu: "50m"
          limits:
            memory: "4Gi" # Change Me
            cpu: "2000m"
        volumeMounts:
        - name: jenkins-home-volume
          mountPath: "/var/jenkins_home"
      volumes:
      - name: jenkins-home-volume
        persistentVolumeClaim:
          claimName: jenkins-home-pvc
Then apply changes to the cluster by executing the following command.
kubectl apply -f jenkins-deployment.yaml -n jenkins
STEP 05: Create a Service Manifest
Now, We have deployed Jenkins on Kubernetes. But, It is still not accessible.
Services in Kubernetes use to expose applications running on Kubernetes pods. Now we need to grant access to the Jenkins via Kubernetes service. So, We need to define a service for the Jenkins server. Here, we expose port 8080 and 50000.
Ok, Let’s create a file named “jenkins-svc.yaml” and paste the content below.
apiVersion: v1
kind: Service
metadata:
  name: jenkins-ui-service
  namespace: jenkins
spec:
  type: ClusterIP # NodePort, LoadBalancer
  ports:
    - protocol: TCP
      port: 8080
      targetPort: 8080
      # nodePort: 30100
      name: ui
  selector:
    app: jenkins
---
apiVersion: v1
kind: Service
metadata:
  name: jenkins-jnlp-service
  namespace: jenkins
spec:
    type: ClusterIP # NodePort, LoadBalancer
  ports:
    - port: 50000
      targetPort: 50000
  selector:
    app: jenkins
And then apply the changes to the cluster.
kubectl apply -f jenkins-svc.yaml -n jenkins

Now you can access the Jenkins Dashboard.
STEP 06: Port-Forwarding (Optional)
As you can see in the service manifest, I have used “ClusterIP” as my network service. So, I need to port-forward Jenkins-UI service to access through my (localhost) computer.
If you plan to deploy on Cloud service, you will get many more options such as ingress controllers. We discuss them in the next tutorial.
For now, I’m going to port forward Jenkins-UI (8080/TCP) to my localhost as I’m deploying Jenkins on Minikube.
Get the Jenkins-UI service details.
dimuthu@srv01:~/jenkins-k8s$ kubectl get svc -n jenkins
NAME                   TYPE        CLUSTER-IP      EXTERNAL-IP   PORT(S)     AGE
jenkins-jnlp-service   ClusterIP   10.106.232.10   <none>        50000/TCP   10m
jenkins-ui-service     ClusterIP   10.98.225.50    <none>        8080/TCP    10m
Now, I’m going to forward my port 8080 to my local machine. Simply run the following command.
dimuthu@srv01:~/jenkins-k8s$ kubectl port-forward service/jenkins-ui-service 8080:8080 -n jenkins
Forwarding from 127.0.0.1:8080 -> 8080
Forwarding from [::1]:8080 -> 8080
STEP 05: Access Jenkins Server
Now, You can access your Jenkins server through the web browser.
http://<YOUR-HOST-NAME-OR-IP>:8080/
For the 1st time, Jenkins will prompt to enter an unlock password. You can get the password by looking at the logs for Jenkins deployment or pod.
Get the name of the deployment.
kubectl get deployments -n jenkins
Look for the initial password in the deployment logs. To get the initial password, You need to execute the following command on your kubectl terminal and copy the output password and paste it into the Administrator password text box.
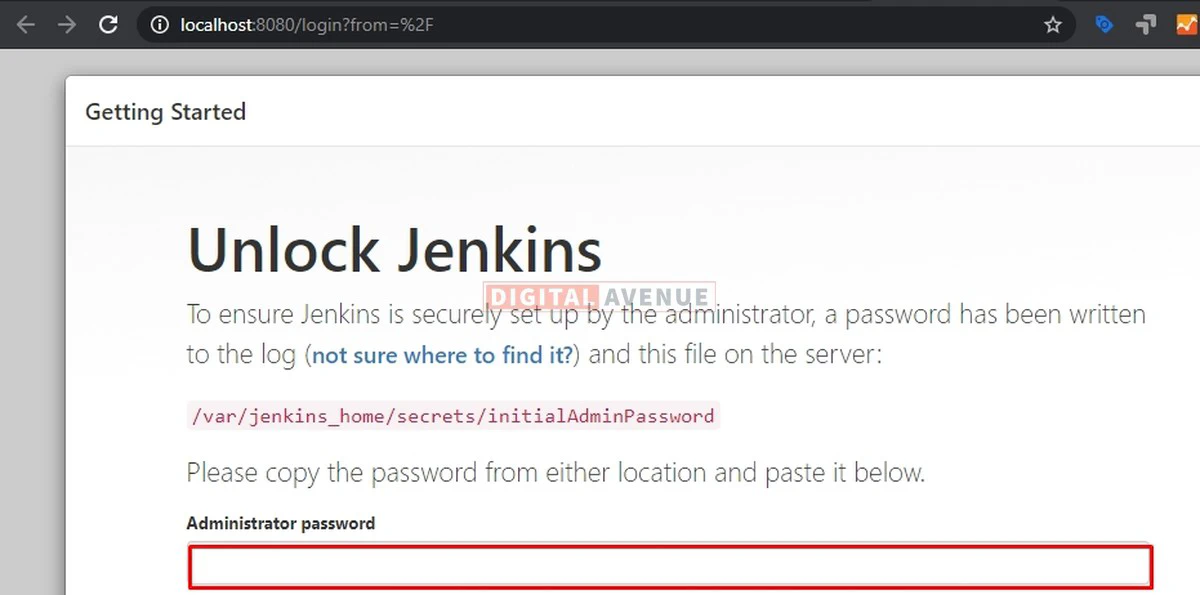
kubectl logs deployment/jenkins-master -n jenkins
706f68110c5b4b3a8846c1208f0c1c7c
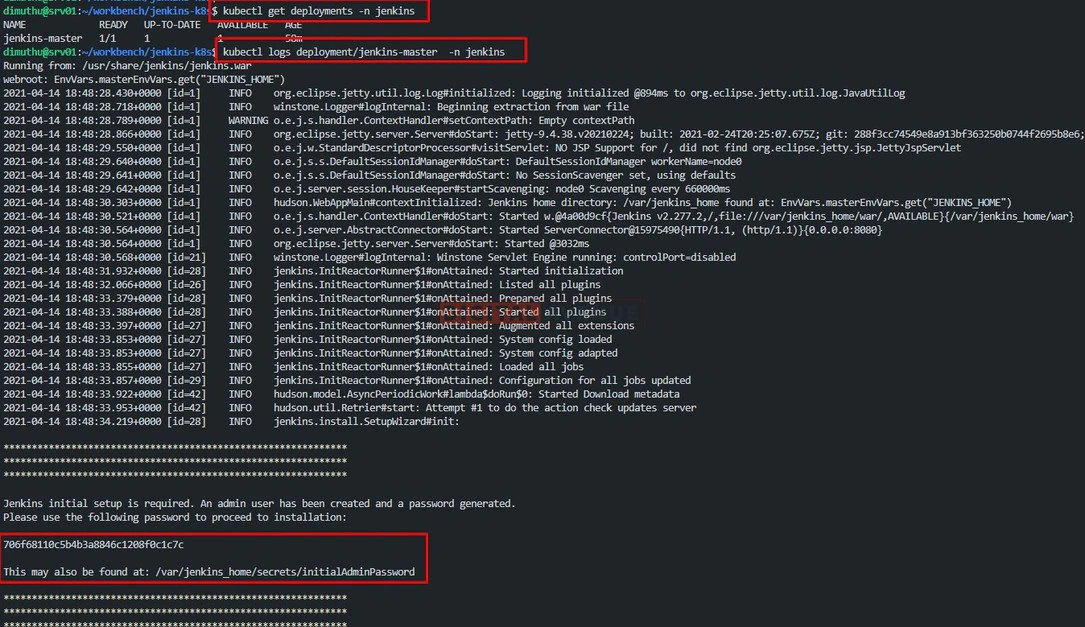
Log output will look like below.
dimuthu@srv01:~/jenkins-k8s$ kubectl logs jenkins-master-d654bbdf5-5bsfz -n jenkins
Running from: /usr/share/jenkins/jenkins.war
webroot: EnvVars.masterEnvVars.get("JENKINS_HOME")
2021-04-14 18:48:28.430+0000 [id=1]     INFO    org.eclipse.jetty.util.log.Log#initialized: Logging initialized @894ms to org.eclipse.jetty.util.log.JavaUtilLog

*************************************************************
*************************************************************
*************************************************************

Jenkins initial setup is required. An admin user has been created and a password generated.
Please use the following password to proceed to installation:

706f68110c5b4b3a8846c1208f0c1c7c

This may also be found at: /var/jenkins_home/secrets/initialAdminPassword

*************************************************************
*************************************************************
*************************************************************
Troubleshooting: If the "initialAdminPassword" not available, You may have to re-deploy the jenkins and try again.
REF: Admin Password Not Available
STEP 07: Install Plugins
In this section, You will need to install Jenkins plugins according to how you will use them. You can choose either option.
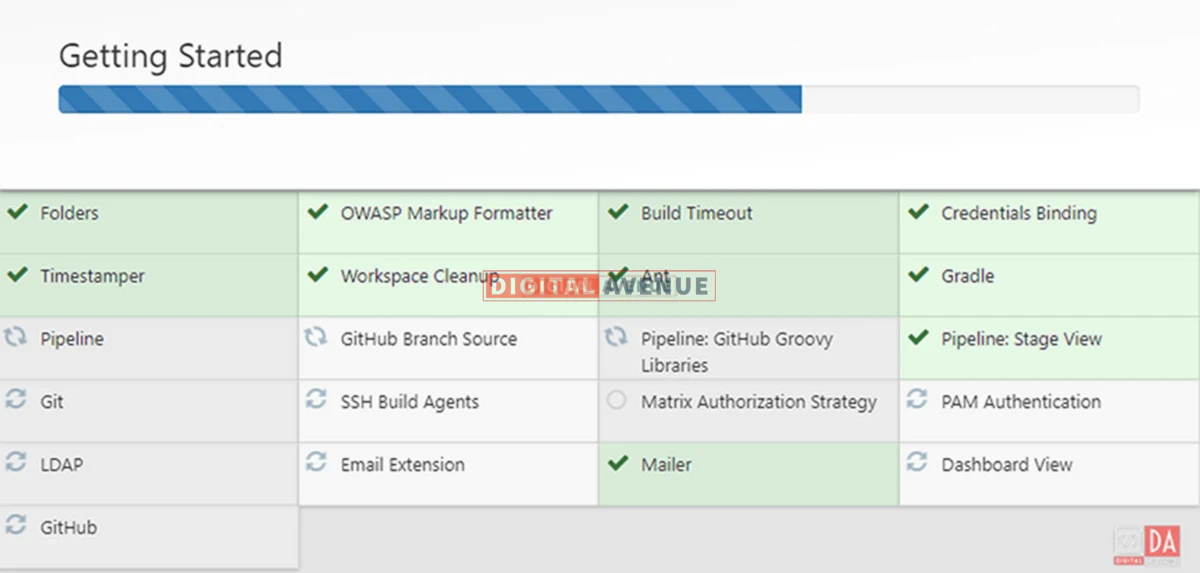
In this case, I’m choosing the “select plugins to install option.”
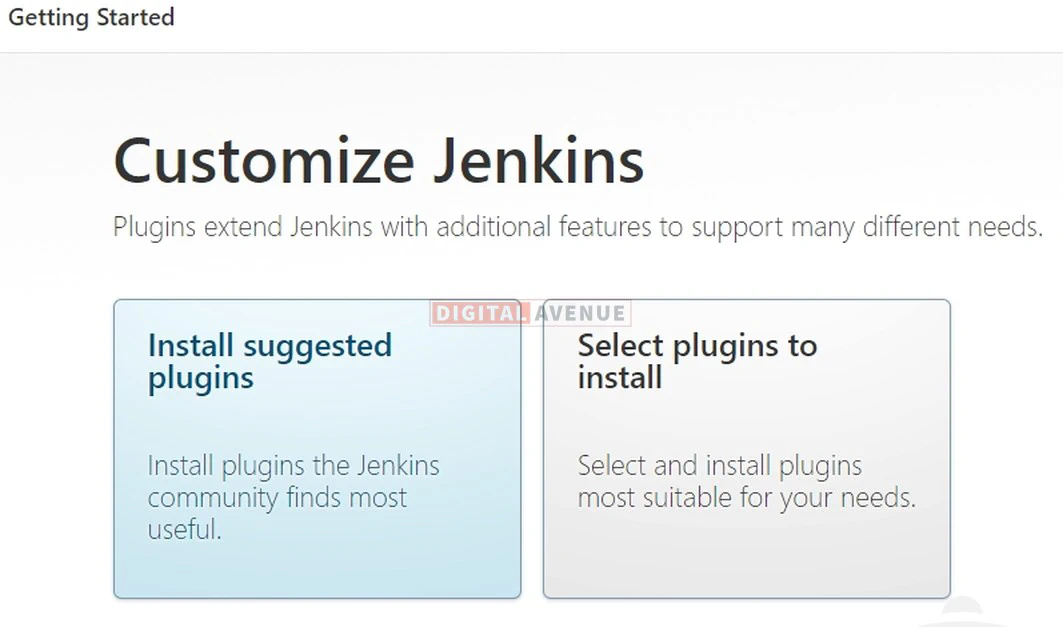
Once you choose the required plugins, click next. This plugin installation may take considerable time. Please wait until completed.
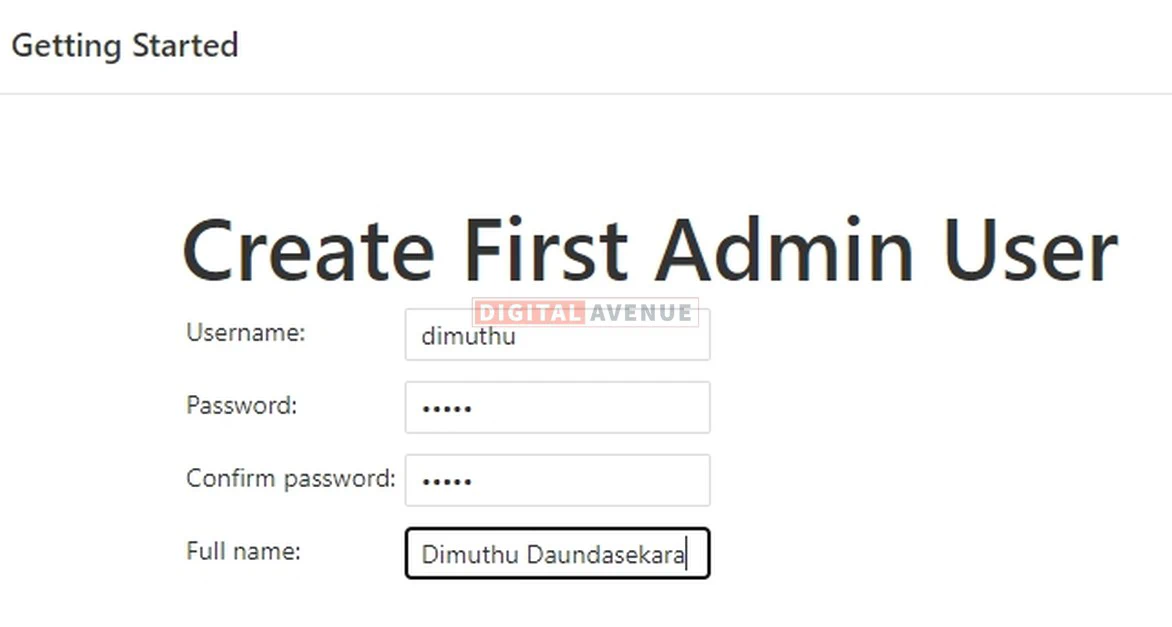
STEP 08: Create First Admin User
Next, You have to provide your “name”, username", “password”, and “email” for the Jenkins admin user.
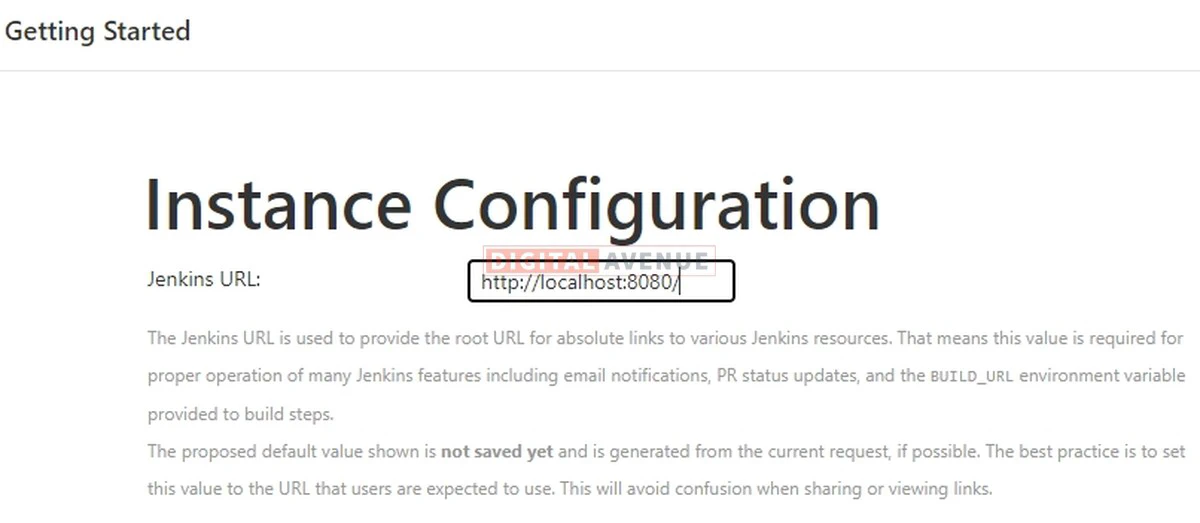
Next, You need to provide your FQDN or IP address. By default, the IP address will automatically load into the “instance URL” section.
Provide a domain name as required. (optional)
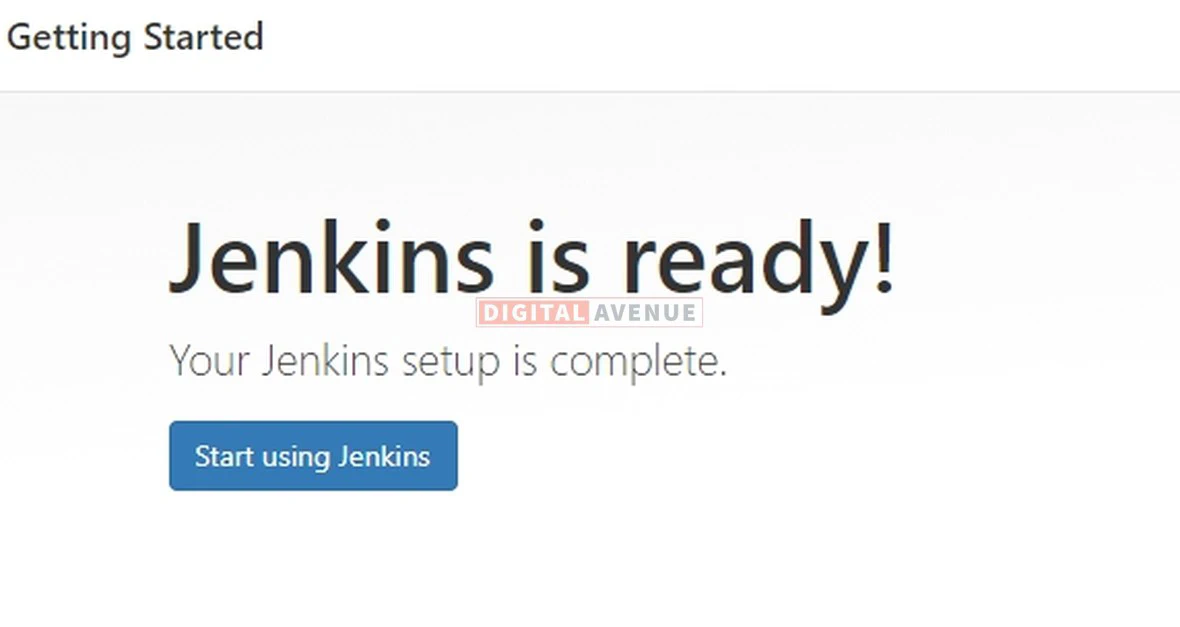
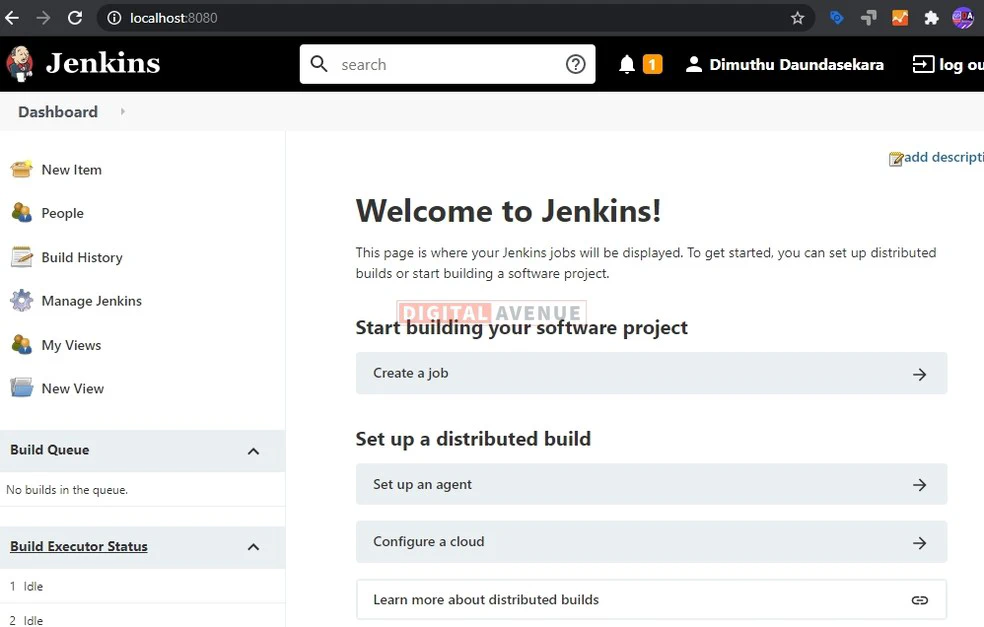
Now we have deployed our Jenkins server on a Kubernetes cluster. Now we can use this Jenkins server as usual. But, We also can set up Jenkins Slave agent to our Jenkins Master.
We will discuss how to set up Jenkins-Slaves in the next tutorial. You can visit the next session from this link.
In this lesson, you learned…
- How to setup how to deploy a Kubernetes cluster
- How to use persistent volumes, attaching services to the deployment.
I hope you learn something new from this tutorial. If you facing any difficulties, please comment below. I’ll regularly jump into comments.
Deploy Production Grade Kubernetes Cluster on Azure AKS
Introduction This tutorial is intended to demonstrate how to setup your 1st Kubernetes cluster on Azure Kubernetes Services (AKS). This tutorial will cover up all the steps that you need to setup complete AKS cluster.
Getting Started With Docker - Quick Start Guide
Getting Started With Docker - Quick Start Guide Docker Engine Platform as a Service (PaaS) Cloud platform service. Allows you to manage its application and data.
How To Run Microsoft SQL Server On Kubernetes - Azure Kubernetes Service
Prerequisites: Azure CLI https://docs.microsoft.com/en-us/cli/azure/install-azure-cli 1. Run the Azure CLI with the az command. 1.1 Run the login command. az login Login in the browser with the azure account.
