How to Install and Configure Jenkins on Ubuntu 18.04 LTS 16.04 Debian
Introduction:
Jenkins is an open-source automation server that provides hundreds of plugin to perform continuous integration and continues delivery to build and deploy projects.
Continuous integration (CI) is a DevOps practice in which team members regularly commit their code changes to the version control repository. Automated builds and tests are run. Continuous delivery (CD) is a series of practices where code changes are automatically built, tested and deployed to production.
If you are a software developer, surely Jenkins suites and automates your CI/CD build tasks quickly.
Jenkins can automate continuous integration and continuous delivery (CI/CD) for any project. Support for hundreds of plugins in the update centre. Which provides infinite possibilities for what Jenkins can do. Jenkins can configure into a distributed system that distributes work across multiple node/machines.
Features:
CICD - Continues Integration and Continues Delivery
Plugins - Hundreds of Plugin Support
Extensible - Extended possibilities using its Plugins
Distributed - Distribute work across multiple machines and projects
Prerequisites:
Hardware - RAM > 1GB | HDD > 50GB+
Software - JAVA (JRE 8 | JDK 11)
Following JDK/JRE Versions support for current Jenkins versions
OpenJDK JDK / JRE 8 - 64 bits
OpenJDK JDK / JRE 11 - 64 bits
NOTE: Always check JAVA version requirement before proceeding with the Jenkins installation.
REF: https://www.jenkins.io/doc/administration/requirements/java/
STEP 01: Install Oracel/Open JDK 11
Now, I’m going to install OpenJDK 11 on my system.
Install OpenJDK
sudo apt update

sudo apt-get install openjdk-11-jdk -y
OR
REF: https://www.oracle.com/java/technologies/javase-jdk11-downloads.html
sudo dpkg -i jdk-11.0.7_linux-x64_bin.deb
Set Default JDK Version
sudo update-alternatives --config java

java -version
STEP 02: Install Jenkins Using Debian Repository
Import trusted PGP Key for Jenkins
sudo wget -q -O - http://pkg.jenkins-ci.org/debian/jenkins-ci.org.key | sudo apt-key add -
Add Jenkins Repository
sudo wget -q -O - https://pkg.jenkins.io/debian/jenkins-ci.org.key | sudo apt-key add -
sudo sh -c 'echo deb http://pkg.jenkins.io/debian-stable binary/ > /etc/apt/sources.list.d/jenkins.list'
Install Jenkins
sudo apt-get update

sudo apt-get install jenkins
Jenkins service will automatically start after the installation process is complete. You can verify it by printing the service status.
sudo systemctl status jenkins
If it isn’t enabled,/started automatically.
sudo systemctl enable jenkins

sudo systemctl start jenkins
STEP 03: Configure Firewall
Allow port 8080 through the Ubuntu firewall.
sudo ufw allow 8080/tcp
STEP 04: Initial Setup For Jenkins
Once the above configuration completed, Open-up your web browser and access it through the IP: PORT.
http://your_ip_or_domain:8080
Now, Head-over to the terminal again, and find out the Administrator password using this command.
sudo cat /var/lib/jenkins/secrets/initialAdminPassword
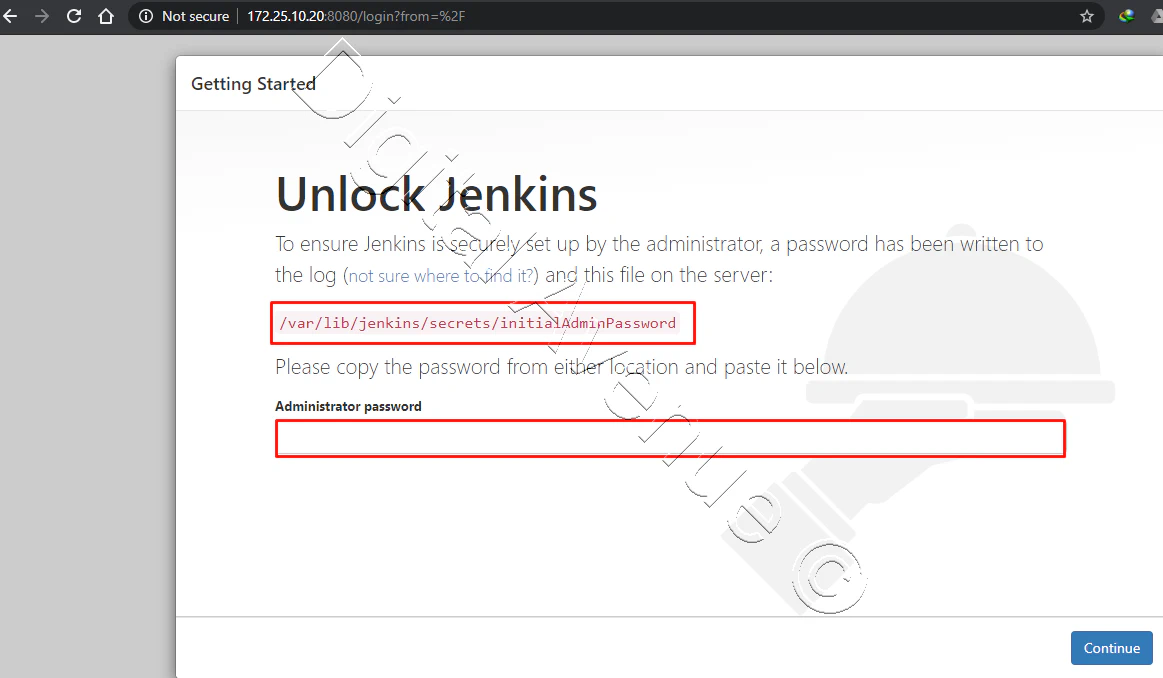
Copy the password from the terminal and paste it into the required field
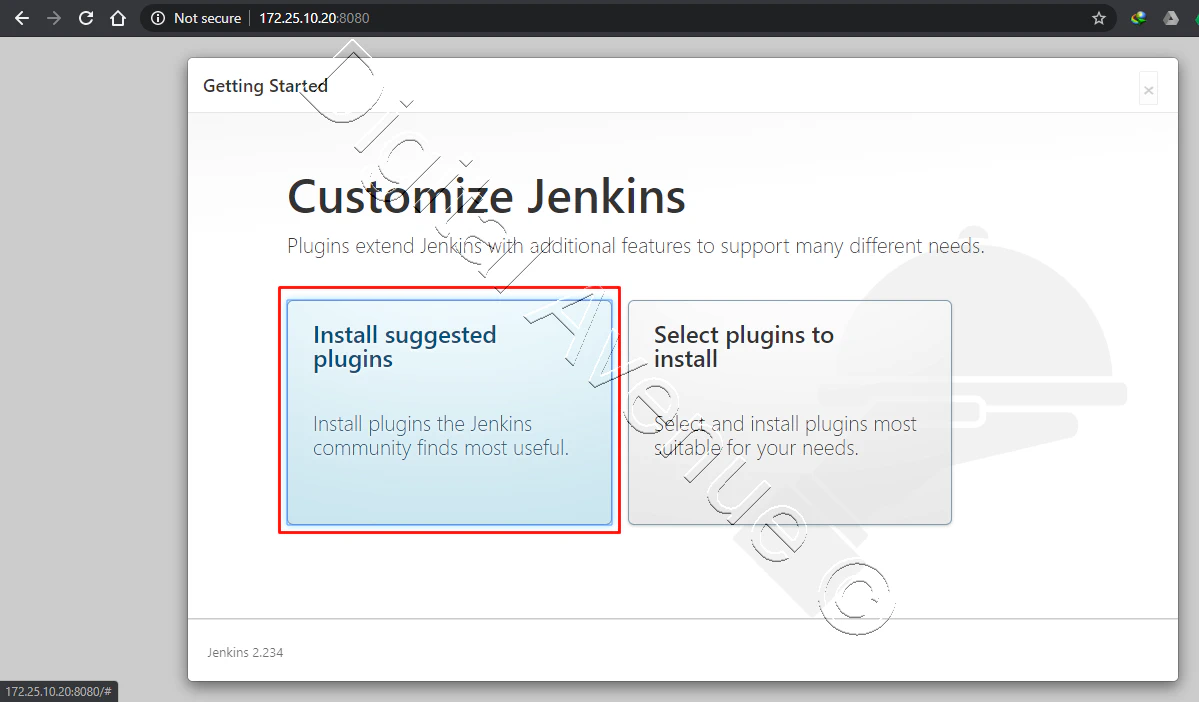
The next screen at the initial setup wizard will ask for Install suggested plugins or select specific plugins. Click on the Install suggested plugins box, and the installation process will start immediately.
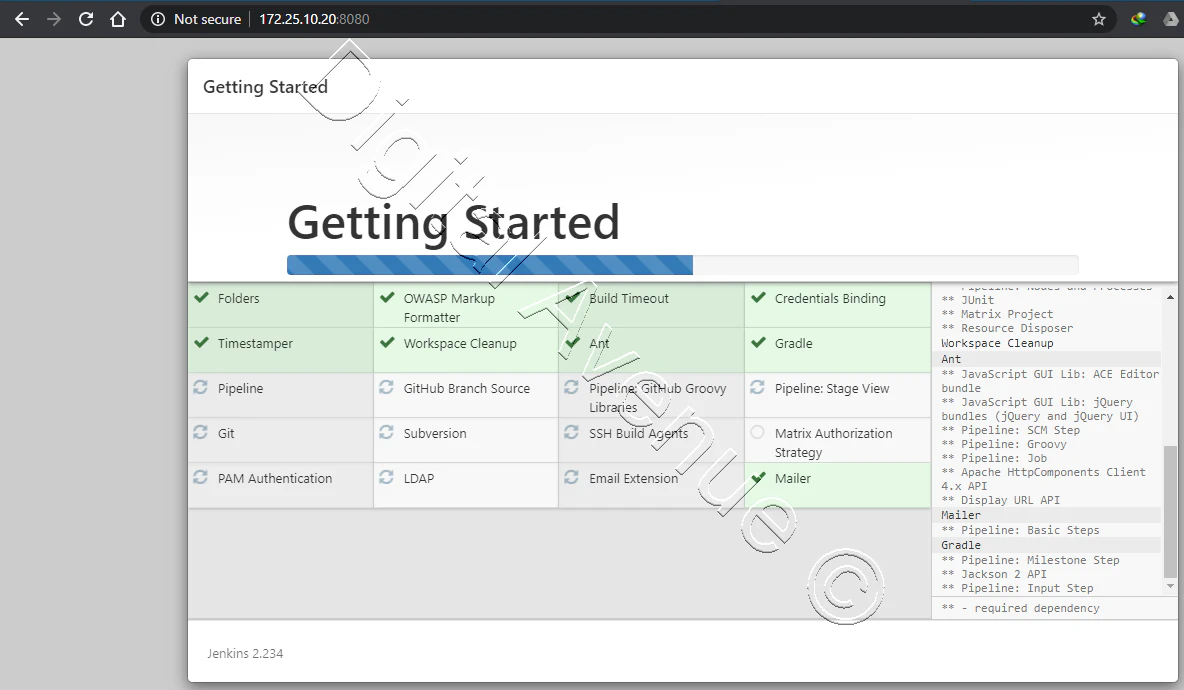
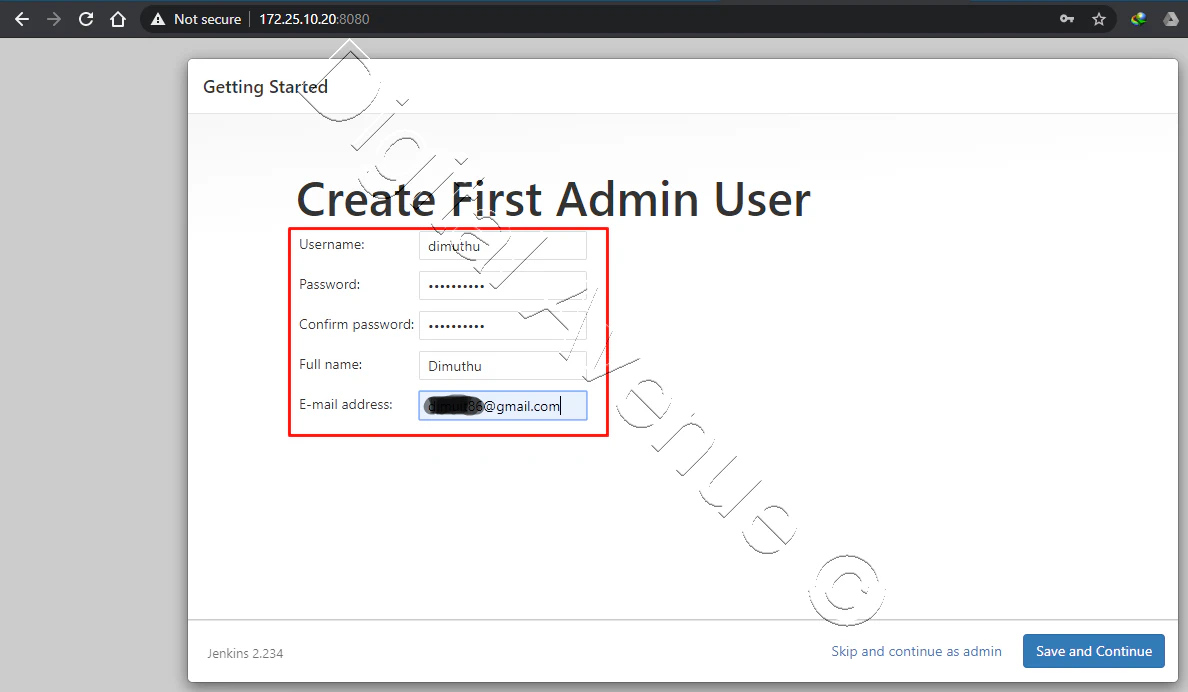
Once the plugins are installed, you will be prompted to set up the first admin user. Fill out all required information and click Save and Continue.
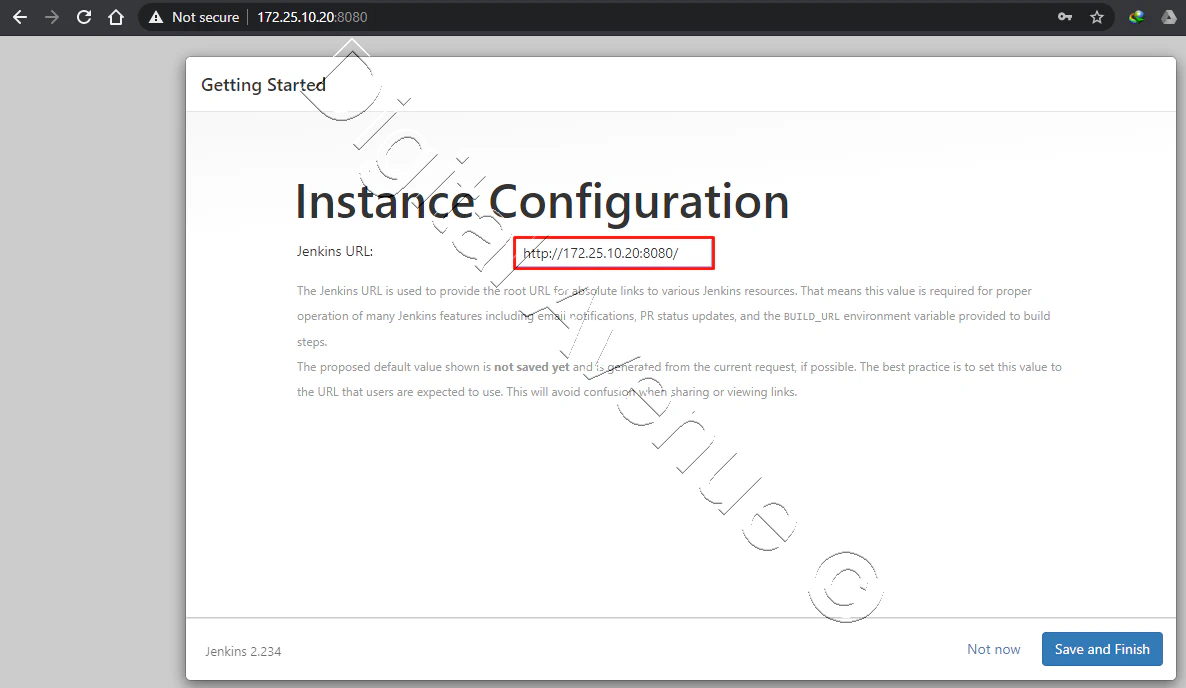
Click on the Start using Jenkins button. You will be redirected to the Jenkins dashboard logged in as the admin user you have created in one of the previous steps.
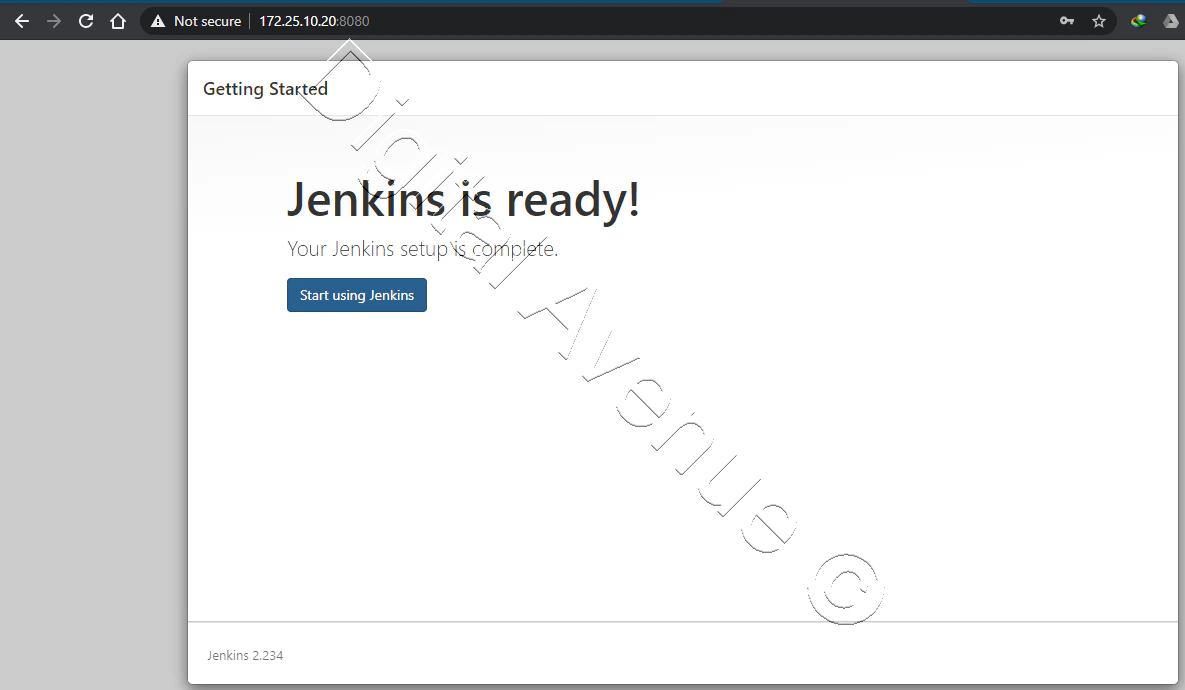
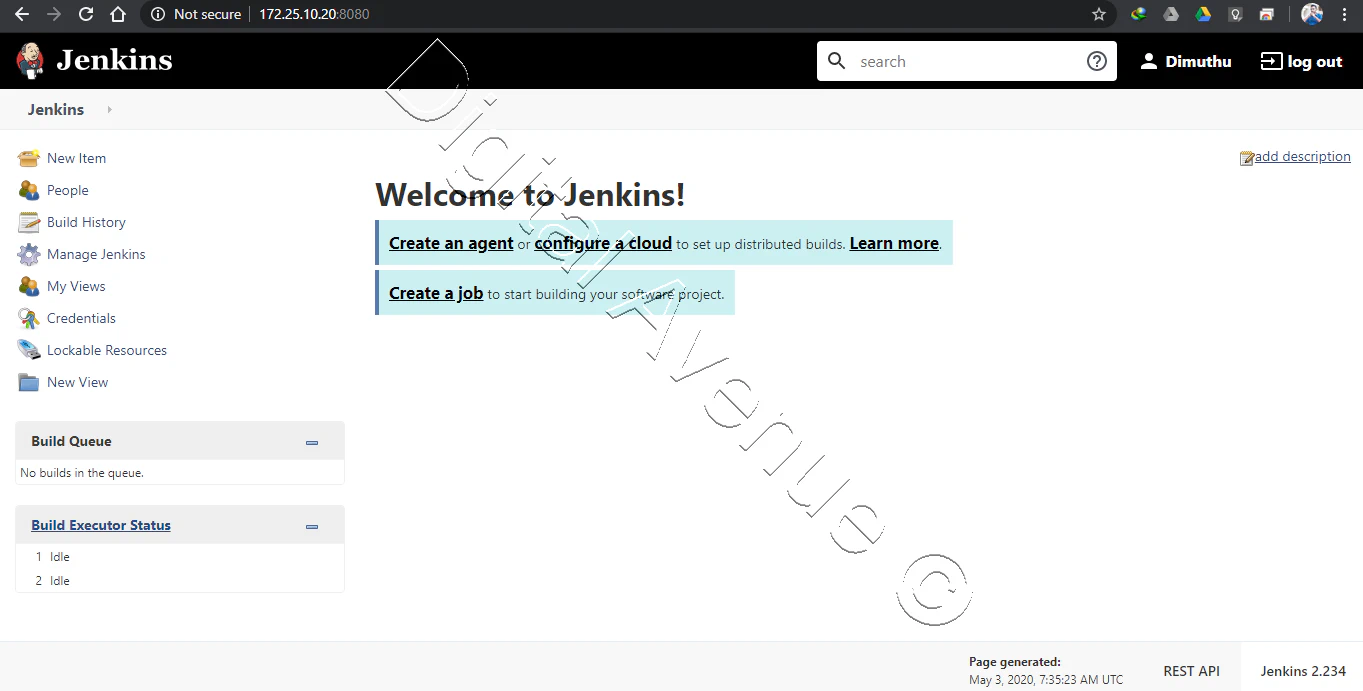
Now you’ve successfully installed Jenkins on your Ubuntu system.
Bottom Line
I hope you learned how to install Jenkins on Ubuntu. And In the next tutorial, I’ll show you how to integrate GitLab with your newly built Jenkins server.
If you have any questions, please leave a comment on the YouTube comment section.
Deploy Production Grade Kubernetes Cluster on Azure AKS
Introduction This tutorial is intended to demonstrate how to setup your 1st Kubernetes cluster on Azure Kubernetes Services (AKS). This tutorial will cover up all the steps that you need to setup complete AKS cluster.
Getting Started With Docker - Quick Start Guide
Getting Started With Docker - Quick Start Guide Docker Engine Platform as a Service (PaaS) Cloud platform service. Allows you to manage its application and data.
How To Run Microsoft SQL Server On Kubernetes - Azure Kubernetes Service
Prerequisites: Azure CLI https://docs.microsoft.com/en-us/cli/azure/install-azure-cli 1. Run the Azure CLI with the az command. 1.1 Run the login command. az login Login in the browser with the azure account.
