Install Wazuh on CentOS and RHEL An Intrusion Detection System
What is Wazuh?
Wazuh is a free, open source and enterprise-ready security detection and monitoring solution.
Wazuh is born as a fork of OSSEC (HIDS) host based intrusion detection system. Later is was integrated with Elastic stack and OpenSCAP.
Which can perform threat detection, integrity monitoring, incident response and compliance.
Wazuh System consist with several components
OSSEC HIDS - Host Based Intrusion Detection System
OpenSCAP - Open Vulnerability Assessment Language
Elastic Stack - Filebeat, Elasticsearch, Kibana
Wazuh is loaded with number of valued capabilities.
Main Features:
1. Security Analytics:
Wazuh is used to collect, aggregate, index and analyze security data which helping to detect intrusions, threats and anomalies.
Endpoint Detection and Response (EDR)
Wazuh Agent actively perform security analysts discover, investigate and perform block a network attack, stop a malicious process or quarantine a malware infected file.
2. Intrusion Detection
Wazuh-Agent scan the monitored system looking for malware, rootkits and suspicious anomalies. Also It can detect hidden files, clocked processes or unregistered network listeners.
3. Log Data Analysis
Wazuh-Agent read operating system and application logs, and forward them to a central Wazuh-Manager for rule-based analysis.
Which helps you to aware of application or system errors,miss-configuration, attempted successful malicious activities, policy violations and many more.
4. File Integrity Monitoring
Wazuh monitors the file system, identifying changes in content, permissions, ownership and attributes of files that you need to keep an eye on.
Also It can identify users and applications used to create or modify files.
5. Vulnerability Detection
Wazuh agent pull software inventory data and send them to the Wazuh Manager server. Then, they matches with CVE (Common Vulnerabilities and Exposure) databases, in order to identify well-know vulnerable software.
Automated vulnerability assessment helps you find the weak spots in your critical assets and take corrective action before attackers exploit them to sabotage your business or steal confidential data.
6. Configuration Assessment
Wazuh monitors system and application configuration settings to ensure they are compliant with you security policies and standards.
Agent automatically performs periodic scan to detect applications that are know to be vulnerable, unpatched, or insecurely configured.
And also It alerts recommendations for better configuration and security hardening.
7. Incident Response
Wazuh take action against active threats such as blocking access from the threat source when certain criteria are met.
8. Regulatory Compliance
Wazuh provides some of necessary security controls to become complaint with industry standards and regulations.
9. Cloud Security
Wazuh helps monitoring cloud infrastructure as an API level. It can pull security data from instances on well known cloud providers such as AWS, Azure, Google Cloud Platform.
10. Containers Security
Wazhuh provides security visibility into your docker hosts and containers.
STEP 01: Perform Prerequisites
A. Install latest yum repositories
yum install https://dl.fedoraproject.org/pub/epel/7/x86_64/Packages/e/epel-release-7-12.noarch.rpm

yum install http://rpms.remirepo.net/enterprise/remi-release-7.rpm

yum install https://www.elrepo.org/elrepo-release-7.0-4.el7.elrepo.noarch.rpm

yum install http://li.nux.ro/download/nux/dextop/el7/x86_64/nux-dextop-release-0-5.el7.nux.noarch.rpm

yum install https://download1.rpmfusion.org/free/el/rpmfusion-free-release-7.noarch.rpm

yum install http://mirror.ghettoforge.org/distributions/gf/el/7/gf/x86_64/gf-release-7-10.gf.el7.noarch.rpm
B. Set Hostname with Fully Qualified Domain Name (FQDN)
[root@server1 ~]# vim /etc/hostname

wazuh-elk
[root@server1 ~]# vim /etc/hosts

172.25.10.50    wazuh-elk.da.com        wazuh-elk
C. SELinux Configuration
[root@server1 ~]# vim /etc/selinux/config

SELINUX=permissive
D. Install Python3
root@server1 ~]# yum install python3
SETP 02: Install Wazuh Manager
A. Install Development Tools, Compilers, and Other Required Packages.
[root@server1 ~]# yum install make gcc policycoreutils-python automake autoconf libtool
OpenSSL will be required to create a system certificate while authentication with Wazuh Agents.
[root@server1 ~]# yum install openssl
Install Latest EPEL-Release
[root@server1 ~]# yum install epel-release yum-utils -y
Install Budild Dependencies of CPython
[root@server1 ~]# yum-builddep python34 -y
B. Download and Extract Wazuh Installation Files
[root@server1 ~]# curl -Ls https://github.com/wazuh/wazuh/archive/v3.11.1.tar.gz | tar zx

[root@server1 ~]# cd wazuh-3.11.1/
C. Run the “Install.sh” Script
This will guide you through the installation process. When Script ask for what kind of installation need to perform, type “manager” to install the Wazuh Manager.
[root@server1 wazuh-3.11.1]# ./install.sh
 (en/br/cn/de/el/es/fr/hu/it/jp/nl/pl/ru/sr/tr) [en]: en

Wazuh v3.11.1 (Rev. 31116) Installation Script - http://www.wazuh.com

You are about to start the installation process of Wazuh.
You must have a C compiler pre-installed in your system.

 - System: Linux server1 3.10.0-862.el7.x86_64 (centos 7.5)
 - User: root
 - Host: server1
1- What kind of installation do you want (manager, agent, local, hybrid or help)? manager

2- Setting up the installation environment.

 - Choose where to install Wazuh [/var/ossec]:

3- Configuring Wazuh.

  3.1- Do you want e-mail notification? (y/n) [n]: y
   - What's your e-mail address? user@gmail.com

   - We found your SMTP server as: alt1.gmail-smtp-in.l.google.com.
   - Do you want to use it? (y/n) [y]: y

   --- Using SMTP server:  alt1.gmail-smtp-in.l.google.com.

  3.2- Do you want to run the integrity check daemon? (y/n) [y]: y

   - Running syscheck (integrity check daemon).

  3.3- Do you want to run the rootkit detection engine? (y/n) [y]: y

   - Running rootcheck (rootkit detection).

  3.4- Do you want to run policy monitoring checks? (OpenSCAP) (y/n) [y]: y

   - Running OpenSCAP (policy monitoring checks).

  3.5- Active response allows you to execute a specific
       command based on the events received.
       By default, no active responses are defined.

   - Default white list for the active response:
      - 172.25.10.1
      - 8.8.8.8

   - Do you want to add more IPs to the white list? (y/n)? [n]: n

  3.6- Do you want to enable remote syslog (port 514 udp)? (y/n) [y]: y

   - Remote syslog enabled.

  3.7 - Do you want to run the Auth daemon? (y/n) [y]: y

   - Running Auth daemon.

  3.8- Do you want to start Wazuh after the installation? (y/n) [y]: y

   - Wazuh will start at the end of installation.

  3.9- Setting the configuration to analyze the following logs:

    -- /var/log/audit/audit.log
    -- /var/ossec/logs/active-responses.log
    -- /var/log/messages
    -- /var/log/secure
    -- /var/log/maillog

 - If you want to monitor any other file, just change
   the ossec.conf and add a new localfile entry.
   Any questions about the configuration can be answered
   by visiting us online at https://documentation.wazuh.com/.


4- Installing the system

 - Running the Makefile

Finished processing dependencies for wazuh==3.11.1
Installing SCAP security policies...
Generating self-signed certificate for ossec-authd...
Building CDB lists...


Created symlink from /etc/systemd/system/multi-user.target.wants/wazuh-manager.service to /etc/systemd/system/wazuh-manager.service.
Starting Wazuh...

 - Configuration finished properly.

 - To start Wazuh:
      /var/ossec/bin/ossec-control start

 - To stop Wazuh:
      /var/ossec/bin/ossec-control stop

 - The configuration can be viewed or modified at /var/ossec/etc/ossec.conf


[root@server1 wazuh-3.11.1]# /var/ossec/bin/ossec-control start
Starting Wazuh v3.11.1...
Started ossec-csyslogd...
Started ossec-dbd...
2020/01/13 05:13:08 ossec-integratord: INFO: Remote integrations not configured. Clean exit.
Started ossec-integratord...
Started ossec-agentlessd...
ossec-authd already running...
wazuh-db already running...
ossec-execd already running...
ossec-maild already running...
ossec-analysisd already running...
ossec-syscheckd already running...
ossec-remoted already running...
ossec-logcollector already running...
ossec-monitord already running...
wazuh-modulesd already running...
Completed.
D. Allow Wazuh Manager Service Ports Through The Firewall
[root@wazuh-elk ~]# firewall-cmd --permanent --add-port={514,1514,1515,1516}/tcp
[root@wazuh-elk ~]# firewall-cmd --permanent --add-port={514,1514}/udp
[root@wazuh-elk ~]# firewall-cmd --reload
514 - send collected events from syslogs
1514 - Send collected event from agents
1515 - Agents registration service
1516 - Wazuh cluster communications
E. Enable Service & Restart
[root@server1 wazuh-3.11.1]# systemctl daemon-reload
[root@server1 wazuh-3.11.1]# systemctl enable wazuh-manager.service
[root@server1 wazuh-3.11.1]# systemctl restart wazuh-manager.service
[root@server1 wazuh-3.11.1]# systemctl status -l  wazuh-manager.service
STEP 03: Install Wazuh API
A. Install NodeJS
NodeJS required in order to run Wazuh API.
[root@server1 ~]# curl --silent --location https://rpm.nodesource.com/setup_8.x | bash -
[root@server1 ~]# sudo yum install gcc-c++ make
[root@server1 ~]# sudo yum install -y nodejs
B. Install Yarn
[root@server1 ~]# curl -sL https://dl.yarnpkg.com/rpm/yarn.repo | sudo tee /etc/yum.repos.d/yarn.repo
[root@server1 ~]# sudo yum install yarn
C. Install Wazuh API
Download & Extract Wazuh API Package
Run this command to download and install the Wazuh API
[root@server1 ~]# curl -s -o install_api.sh https://raw.githubusercontent.com/wazuh/wazuh-api/v3.11.1/install_api.sh && bash ./install_api.sh download
API URL: http://host_ip:55000/
user: 'foo'
password: 'bar'
Configuration: /var/ossec/api/configuration
Test: curl -u foo:bar -k http://127.0.0.1:55000?pretty
Note: You can configure the API executing /var/ossec/api/scripts/configure_api.sh

### [API installed successfully] ###
D. Allow Wazuh-API Service Port Through the Firewall
55000/TCP - Incoming HTTP requests
[root@wazuh-elk ~]# firewall-cmd --permanent --add-port=55000/tcp
[root@wazuh-elk ~]# firewall-cmd --reload
E. Enable Service & Restart
[root@wazuh-elk ~]# systemctl enable wazuh-api.service
[root@wazuh-elk ~]# systemctl restart wazuh-api.service
[root@wazuh-elk ~]# systemctl status -l wazuh-api.service
REF: https://documentation.wazuh.com/3.11/installation-guide/installing-wazuh-manager/linux/centos/wazuh_server_sources_centos.html#wazuh-server-sources-centos
STEP 04: Install Filebeat
Filebeat is a fork of the Elastic Stack. Filebeat use to forward alerts and event to Elasticsearch.
A. Import Public GPG Key
[root@wazuh-elk ~]# rpm --import https://packages.elastic.co/GPG-KEY-elasticsearch
B. Create YUM Repository File
[root@wazuh-elk ~]# vim /etc/yum.repos.d/elastic.repo
[elasticsearch-7.x]
name=Elasticsearch repository for 7.x packages
baseurl=https://artifacts.elastic.co/packages/7.x/yum
gpgcheck=1
gpgkey=https://artifacts.elastic.co/GPG-KEY-elasticsearch
enabled=1
autorefresh=1
type=rpm-md
C. Install Filebeat
[root@wazuh-elk ~]# yum install filebeat
D. Download pre-configured Configuration File
This file pre-configured to forward alerts Elasticsearch.
[root@wazuh-elk ~]# curl -so /etc/filebeat/filebeat.yml https://raw.githubusercontent.com/wazuh/wazuh/v3.11.1/extensions/filebeat/7.x/filebeat.yml
Provide required permission
[root@wazuh-elk ~]# chmod go+r /etc/filebeat/filebeat.yml
E. Download alerts template for Elasticsearch
[root@wazuh-elk ~]# curl -so /etc/filebeat/wazuh-template.json https://raw.githubusercontent.com/wazuh/wazuh/v3.11.1/extensions/elasticsearch/7.x/wazuh-template.json
Provide required permission
[root@wazuh-elk ~]# chmod go+r /etc/filebeat/wazuh-template.json
F. Download Wazuh module for Filebeat
[root@wazuh-elk ~]# curl -s https://packages.wazuh.com/3.x/filebeat/wazuh-filebeat-0.1.tar.gz | sudo tar -xvz -C /usr/share/filebeat/module
REF: https://documentation.wazuh.com/3.11/installation-guide/installing-wazuh-manager/linux/centos/wazuh_server_packages_centos.html#wazuh-server-packages-centos-filebeat
STEP 05: Install JAVA JDK
Java is required for the Elastic stack deployment. Java is to be installed on Elasticseach node.
A. Download & Install JDK RPM
[root@wazuh-elk /]# rpm -ivh jdk-13.0.1_linux-x64_bin.rpm
B. Set Default JAVA Version
[root@wazuh-elk /]# alternatives --config java
[root@wazuh-elk /]# alternatives --set jar /usr/java/jdk-13.0.1/bin/jar
[root@wazuh-elk /]# alternatives --set javac /usr/java/jdk-13.0.1/bin/javac
C. Set JAVA Environment Variables
Set the JAR and JAVAC paths Add entries into .bashrc and .bash_profile for the persistence even after the reboot.
[root@wazuh-elk /]# export JAVA_HOME=/usr/java/jdk-13.0.1/
[root@wazuh-elk /]# export PATH=$PATH:/usr/java/jdk-13.0.1/bin/
[root@wazuh-elk /]# vim ~/.bashrc
export JAVA_HOME=/usr/java/jdk-13.0.1/
export PATH=$PATH:/usr/java/jdk-13.0.1/bin/
[root@wazuh-elk /]# vim ~/.bash_profile
export JAVA_HOME=/usr/java/jdk-13.0.1/
export PATH=$PATH:/usr/java/jdk-13.0.1/bin/
STEP 06: Install Elasticsearch
A. Install Elasticsearch From YUM Repositories.
[root@wazuh-elk ~]# yum install elasticsearch
B. Allow Elasticearch Service Ports Through The Firewall
9200/tcp - Elasticearch RESTful API 9300-9400/tcp - Elasticsearch cluster communication
[root@wazuh-elk ~]# firewall-cmd --permanent --add-port={9200,9300}/tcp
[root@wazuh-elk ~]# firewall-cmd --reload
C. Configure Elasticsearch
Make Elasticsearch to be able to listening on non loopback IP address. In here you can add current machine IP address. I’m not going to change the loopback IP, because this is the one Elastic node I’m going to setup. So, It doesn’t need to talk outside.
[root@wazuh-elk ~]# vim /etc/elasticsearch/elasticsearch.yml
node.name: node-1
network.host: 127.0.0.1
http.port: 9200
cluster.initial_master_nodes: ["node-1""]
[root@wazuh-elk ~]# cat /etc/elasticsearch/elasticsearch.yml | grep -v "^#"
node.name: node-1
path.data: /var/lib/elasticsearch
path.logs: /var/log/elasticsearch
network.host: 127.0.0.1
http.port: 9200
cluster.initial_master_nodes: ["node-1"]
D. JVM Option Configuration
Set initial/maximum size of total heap space. If your system has less memory. You should configure it to use small megabytes of ram.
This amount of assigned memory may be vary to amount of your server’s total physical memory.
In this case I have 6GiB of total physical memory for the demonstration purpose.
[root@wazuh-elk ~]# vim /etc/elasticsearch/jvm.options
-Xms2g
-Xmx2g
D. Enalbe Service & Restart
[root@wazuh-elk /]# sudo systemctl daemon-reload
[root@wazuh-elk /]# sudo systemctl enable elasticsearch.service
[root@wazuh-elk /]# sudo systemctl start elasticsearch.service
STEP 07: Configure Filebeat Output For Elasticsearch
[root@wazuh-elk ~]# vim /etc/filebeat/filebeat.yml
output.elasticsearch.hosts: ['http://127.0.0.1:9200']
REF: https://documentation.wazuh.com/3.11/installation-guide/installing-wazuh-manager/linux/centos/wazuh_server_packages_centos.html#wazuh-server-packages-centos-filebeat
STEP 08: Load Filebeat Template
[root@wazuh-elk ~]# filebeat setup --index-management -E setup.template.json.enabled=false
REF: https://documentation.wazuh.com/3.11/installation-guide/installing-elastic-stack/elastic_server_rpm.html
STEP 09: Install Kibana
Kibana is the Web interface for visualizing the events stored in elasticsearch.
A. Install Kibana
[root@wazuh-elk ~]# yum install kibana
B. Install Wazuh App plugin For Kibana
[root@wazuh-elk /]# sudo -u kibana /usr/share/kibana/bin/kibana-plugin install https://packages.wazuh.com/wazuhapp/wazuhapp-3.11.1_7.5.1.zip
C. Configure Kibana
Make Kibana to be able to listening on outside of the network and provide Elasticsearch instance IP address.
In this case I’m going to keep loopback IP for Elasticsearch, Since I don’t want to expose outside network.
[root@wazuh-elk /]# vim /etc/kibana/kibana.yml
server.port: 5601
server.host: "172.25.10.50"
elasticsearch.hosts: ["http://127.0.0.1:9200"]
D. Allow Kibana Service Port Through The Firewall
5601/tcp - Kibana Web Interface
[root@wazuh-elk /]# firewall-cmd --permanent --add-port=5601/tcp
[root@wazuh-elk /]# firewall-cmd --reload
E. Enable Service & Restart
[root@wazuh-elk /]# systemctl daemon-reload
[root@wazuh-elk /]# systemctl enable kibana.service
[root@wazuh-elk /]# systemctl start kibana.service
REF: https://documentation.wazuh.com/3.11/installation-guide/installing-elastic-stack/elastic_server_rpm.html
TROUBLESHOOTING TIPS
ERROR: wazuh-elk kibana[6972]: Browserslist: caniuse-lite is outdated. Please run next command `npm update`

[root@wazuh-elk ~]# yarn install

[root@wazuh-elk ~]# yarn upgrade caniuse-lite browserlist

[root@wazuh-elk ~]# npm update
CLIENT SIDE CONFIGURATION - Adding & Registering Wazuh Agent
Wazuh Agent:
Wazuh agent runs on the host that you want to monitor.
Wazuh Agent has following capabilities
- Log & data collection
- File integrity monitoring
- Rootkit and malware detection
- security policy monitoring
- Configuration assessment
- software inventory
In this scenario I’m going to install Wazuh Agent on CentOS and Ubuntu.
STEP 01: Install Wazuh Agent
A. Install Development Tools and Compilers
[root@cl1 ~]# yum install make gcc policycoreutils-python automake autoconf libtool
Install “openssl” in order to support certificate creation while installation.
[root@cl1 ~]# yum install openssl
B. Download & Extract Latest Wazuh Package
[root@cl1 ~]# curl -Ls https://github.com/wazuh/wazuh/archive/v3.11.1.tar.gz | tar zx
C. Install Wazuh Agent
Run “install.sh” script. This will guide you through out the installation process.
Provide necessary responses while the installation process.
[root@cl1 ~]# cd wazuh-3.11.1/

[root@cl1 wazuh-3.11.1]# ./install.sh
[root@cl1 wazuh-3.11.1]# ./install.sh

  ** For installation in English, choose [en].
  (en/br/cn/de/el/es/fr/hu/it/jp/nl/pl/ru/sr/tr) [en]: en
 Wazuh v3.11.1 (Rev. 31116) Installation Script - http://www.wazuh.com

 You are about to start the installation process of Wazuh.
 You must have a C compiler pre-installed in your system.

  - System: Linux cl1 3.10.0-862.el7.x86_64 (centos 7.5)
  - User: root
  - Host: cl1
1- What kind of installation do you want (manager, agent, local, hybrid or help)? agent

  - Agent (client) installation chosen.

2- Setting up the installation environment.

 - Choose where to install Wazuh [/var/ossec]:


    - Installation will be made at  /var/ossec .

3- Configuring Wazuh.

  3.1- What's the IP Address or hostname of the Wazuh server?: 172.25.10.50

   - Adding Server IP

  3.2- Do you want to run the integrity check daemon? (y/n) [y]: y

   - Running syscheck (integrity check daemon).

  3.3- Do you want to run the rootkit detection engine? (y/n) [y]: y

   - Running rootcheck (rootkit detection).

  3.4- Do you want to run policy monitoring checks? (OpenSCAP) (y/n) [y]: y

   - Running OpenSCAP (policy monitoring checks).

  3.5 - Do you want to enable active response? (y/n) [y]: y

   - Active response enabled.

  3.6- Remote upgrades use packages signed by the system maintainer. The
       corresponding certificate (or root certificate) must be installed
       in the system in order to verify the WPK packages. By default,
       the root certificate by Wazuh is installed.

   - Do you want to add more certificates? (y/n)? [n]:

  3.7- Setting the configuration to analyze the following logs:

    -- /var/log/audit/audit.log
    -- /var/ossec/logs/active-responses.log
    -- /var/log/messages
    -- /var/log/secure
    -- /var/log/maillog

 - If you want to monitor any other file, just change
   the ossec.conf and add a new localfile entry.
   Any questions about the configuration can be answered
   by visiting us online at https://documentation.wazuh.com/.

4- Installing the system

 - Running the Makefile

 - Configuration finished properly.

 - To start Wazuh:
      /var/ossec/bin/ossec-control start

 - To stop Wazuh:
      /var/ossec/bin/ossec-control stop

 - The configuration can be viewed or modified at /var/ossec/etc/ossec.conf


 - You first need to add this agent to the server so they
   can communicate with each other. When you have done so,
   you can run the 'manage_agents' tool to import the
   authentication key from the server.
   /var/ossec/bin/manage_agents
D. Allow Wazuh-Agent Service Port Through The Firewall
[root@cl1 ~]# firewall-cmd --permanent --add-port={514,1514}/udp
[root@cl1 ~]# firewall-cmd --reload
Now, Wazuh manger and agent configuration has been completed. Then, We need to add Wazuh-Agents into Wazuh-Manager.
REF: https://documentation.wazuh.com/3.11/installation-guide/installing-wazuh-agent/linux/centos6-or-greater/wazuh_agent_sources_centos6_or_greater.html#wazuh-agent-sources-centos6-or-greater
Registering Agents
STEP 01: Add an agent - Add a CentOS/Redhat Client Agent To Wazuh-Manager
Let’s head over to Wazuh-Manager and perform these configurations.
On the Manager:
Execute this command to add new agent to wazuh-manager.
/var/ossec/bin/manage_agents -a <Agent_IP_Adress> -n <Agent_Hostname>
[root@wazuh-elk /]# /var/ossec/bin/manage_agents -a 172.25.10.100 -n cl1
****************************************
* Wazuh v3.11.1 Agent manager.         *
* The following options are available: *
****************************************
   (A)dd an agent (A).
   (E)xtract key for an agent (E).
   (L)ist already added agents (L).
   (R)emove an agent (R).
   (Q)uit.
Choose your action: A,E,L,R or Q:
- Adding a new agent (use 'q' to return to the main menu).
  Please provide the following:
   * A name for the new agent:    * The IP Address of the new agent: Confirm adding it?(y/n): Agent added with ID 001.

manage_agents: Exiting.
STEP 02: List The Agents
Execute this command to list the agent to get the ID of the added agent (cl1).
[root@wazuh-elk /]# /var/ossec/bin/manage_agents -l
OR
[root@wazuh-elk /]# /var/ossec/bin/manage_agents
****************************************
* Wazuh v3.11.1 Agent manager.         *
* The following options are available: *
****************************************
   (A)dd an agent (A).
   (E)xtract key for an agent (E).
   (L)ist already added agents (L).
   (R)emove an agent (R).
   (Q)uit.
Choose your action: A,E,L,R or Q: L

Available agents:
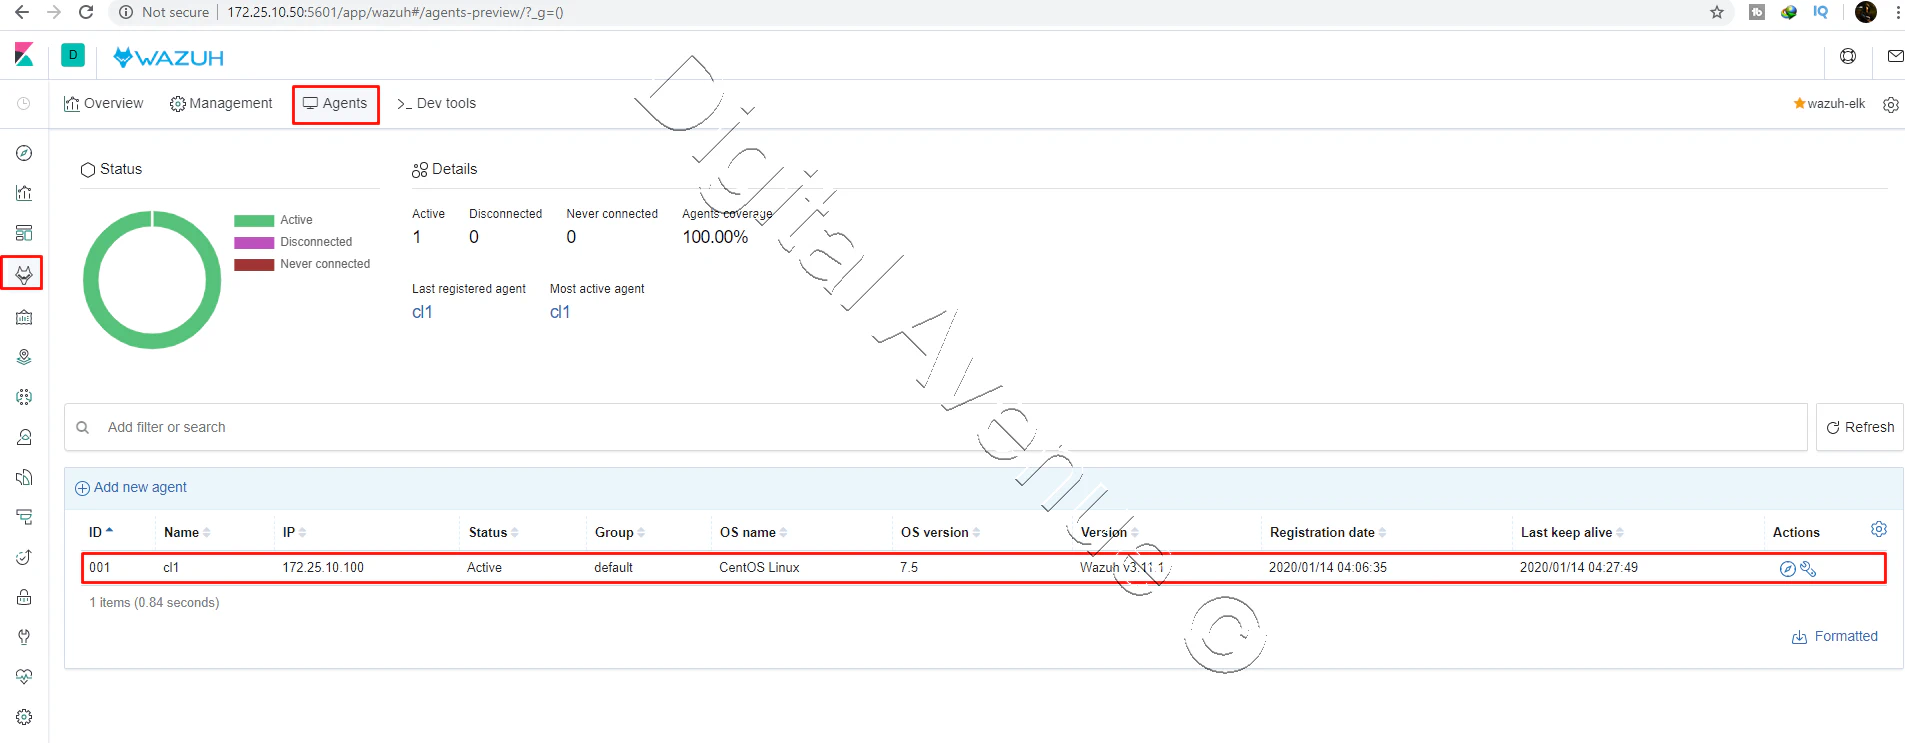
   ID: 001, Name: cl1, IP: 172.25.10.100
STEP 03: Extract Newly Added Agent’s Key
Execute this command with the agent “ID” and extract the new agent’s key. Cpy this key you will need it for the agent registration.
[root@wazuh-elk /]# /var/ossec/bin/manage_agents -e 001
Agent key information for '001' is:
MDAxIGNsMSAxNzIuMjUuMTAuMTAwIDU4N2Y2ZmYyMDA0NmY1NzZmMDc2ODJkOWFlMzM5ZmM1OWY0YzQzYjBhZTk0MjI3NTQyZTkxYTczZmEyZTk4Njk=
Now, Let’s head over to agent host.
On the Agent
STEP 04: Import the Key To The Agent and Connect Agent To The Manger
[root@cl1 /]# /var/ossec/bin/manage_agents -i MDAxIGNsMSAxNzIuMjUuMTAuMTAwIDU4N2Y2ZmYyMDA0NmY1NzZmMDc2ODJkOWFlMzM5ZmM1OWY0YzQzYjBhZTk0MjI3NTQyZTkxYTczZmEyZTk4Njk=
Agent information:
   ID:001
   Name:cl1
   IP Address:172.25.10.100

Confirm adding it?(y/n): y
Added.
OPTIONAL - Check for Wazuh Manager’s IP
Edit the Wazuh agent configuration in “/var/ossec/etc/ossec.conf” to add/change the Wazuh Manager Server IP address.
[root@cl1 /]# vim /var/ossec/etc/ossec.conf
STEP 05: Restart Wazuh Agent Service
[root@cl1 /]# systemctl restart wazuh-agent
[root@cl1 /]# systemctl status -l  wazuh-agent
REF: https://documentation.wazuh.com/3.11/user-manual/registering/cli/using-command-line-linux.html
Add a Ubuntu Client Agent To Wazuh-Manager
On The Manager:
[root@wazuh-elk ~]# /var/ossec/bin/manage_agents -a 172.25.10.110 -n DA-PC
****************************************
* Wazuh v3.11.1 Agent manager.         *
* The following options are available: *
****************************************
   (A)dd an agent (A).
   (E)xtract key for an agent (E).
   (L)ist already added agents (L).
   (R)emove an agent (R).
   (Q)uit.
Choose your action: A,E,L,R or Q:
- Adding a new agent (use 'q' to return to the main menu).
  Please provide the following:
   * A name for the new agent:
   * * The IP Address of the new agent:
   * Confirm adding it?(y/n):
   * Agent added with ID 002.

manage_agents: Exiting.
Follow the on screen guide and generate a code.
STEP 01: Adding an agent
root@DA-PC:~# curl -so wazuh-agent.deb https://packages.wazuh.com/3.x/apt/pool/main/w/wazuh-agent/wazuh-agent_3.11.1-1_amd64.deb && sudo WAZUH_MANAGER_IP='172.25.10.50' dpkg -i ./wazuh-agent.deb
STEP 02: Extract new agent’s key
[root@wazuh-elk ~]# /var/ossec/bin/manage_agents -e 002
Agent key information for '002' is:
MDAyIERBLVBDIDE3Mi4yNS4xMC4xMTAgMDU3NGM5NGE3M2I5MDE4ZTE5NDdmMGQ4NTBjYzE0MWIwNDgwYTViZGY4YmY0NmU5MTA1ZWE2YWZmN2M3ODc2OA==
On the Agent
STEP 03: Import the created key for new agent at the Manger
root@DA-PC:~# /var/ossec/bin/manage_agents -i MDAyIERBLVBDIDE3Mi4yNS4xMC4xMTAgMDU3NGM5NGE3M2I5MDE4ZTE5NDdmMGQ4NTBjYzE0MWIwNDgwYTViZGY4YmY0NmU5MTA1ZWE2YWZmN2M3ODc2OA==
Agent information:
   ID:002
   Name:DA-PC
   IP Address:172.25.10.110

Confirm adding it?(y/n): y
Added.
STEP 04: Restart Wazuh Agent Service
root@DA-PC:~# systemctl restart wazuh-agent.service


Deploy Production Grade Kubernetes Cluster on Azure AKS
Introduction This tutorial is intended to demonstrate how to setup your 1st Kubernetes cluster on Azure Kubernetes Services (AKS). This tutorial will cover up all the steps that you need to setup complete AKS cluster.
Getting Started With Docker - Quick Start Guide
Getting Started With Docker - Quick Start Guide Docker Engine Platform as a Service (PaaS) Cloud platform service. Allows you to manage its application and data.
How To Run Microsoft SQL Server On Kubernetes - Azure Kubernetes Service
Prerequisites: Azure CLI https://docs.microsoft.com/en-us/cli/azure/install-azure-cli 1. Run the Azure CLI with the az command. 1.1 Run the login command. az login Login in the browser with the azure account.


