Install and Configure Zabbix 4.4 on CentOS8 RHEL8
In this tutorial, I’m going to cover up how to install and configure Zabbix 4.4 Monitoring Server on CentOS8
Introduction:
Zabbix is an enterprise-class free open source monitoring solution.
Newly released Zabbix Monitoring solution empowered with unlimited capabilities of monitoring any IT device in house.
Which allows you to keep eye on any kinds of IT infrastructure, services, applications and resources.
You will get ability to monitor any performance metrics and incidents in your network such as Power status, System Status, CPU, Memory and Network bandwidth usage, Packet Loss rate, Link status, New device added or removed. And many more…
- Which provides real-time graphing and highly configurable graphing facility to users.
- Available thousands of templates on the Zabbix share. Which is a community to share thousands of templates and scripts accomplish the monitoring tasks.
- Automatic network discovery provides agent auto registration facility.
- Zabbix API provides interface for 3rd party software integration such as Grafana and many more.
For this tutorial, I will going to install Zabbix using yum destitution package for CentOS and RHEL.
STEP 01: Configure Prerequisitess
A. Set Resolvable Hostname:
Now, I’m going to set host-name with fully qualified domain name(FQDN).
vim /etc/hostname
vim /etc/hosts
B. Install Latest EPEL Release:
Now, I’m going to install latest epel release
rpm -ivh https://dl.fedoraproject.org/pub/epel/8/Everything/x86_64/Packages/e/epel-release-8-7.el8.noarch.rpm
C. Update Operating System:
Then, Update the Operating System.
yum -y update
D. Configure SELinux:
You need to execute these commands, If you have enabled SELinux in “enforcing” mode.
setsebool -P httpd_can_connect_zabbix on

setsebool -P httpd_can_network_connect_db on
Either, You also can set SELinux into “permissive” mode
vim /etc/selinux/config
SELINUX=permissive
E. Reboot the System:
STEP 02: Install Apache HTTPD Web Server
A. Install HTTPD Package:
Now, I’ll going to install httpd package for web server.
yum install httpd httpd-tools
B. Enable & Start HTTPD Service:
Enable service to start automatically at the system boots.
systemctl enable httpd.service
Then, Start service.
systemctl start httpd.service
C. Allow HTTPD Through The Firewall:
Allow port 80 for Apache service through out the system firewall.
firewall-cmd --permanent --add-service=http
firewall-cmd --permanent --add-service=https
firewall-cmd --permanent --add-port=80/tcp
firewall-cmd --permanent --add-port=443/tcp
firewall-cmd --reload
D. verify The Service is Running:
Finally, Check weather the Apache service and listen through the port 80
netstat -tulpen | grep httpd
Now, goto /var/www/html/ directory and create a index.html file.
vim /var/www/html/index.html
"THIS IS A TEST PAGE"
Save and exit.
Then, Open up the web browser and hit the server’s IP address
http://<your_server_ip_address>/
OK, Now you’ll see Apache testing page. Now Apache configuration has been completed.
Let’s head-over to next step.
STEP 03: Install & Configure PHP
A. Install PHP & Dependencies:
Now, I’m going to install PHP and required PHP dependencies which required to run Zabbix fronted.
I Here, PHP used to gather matrices from MariaDB/Mysql database and process to display dynamic content via Apache web server
yum -y install php php-cli php-common php-devel php-pear php-gd php-mbstring php-mysqlnd php-xml php-bcmath
Then, We need to configure “php.ini” file with these variables.
B. Configure PHP:
vim /etc/php.ini
OR
echo "<?php phpinfo(); ?>" | sudo tee /var/www/html/info.php
max_execution_time = 600
max_input_time = 600
memory_limit = 1024M
post_max_size = 32M
upload_max_filesize = 32M
date.timezone = Asia/Colombo
C. Test PHP:
Finally, Create a “info.php” file to check whether PHP working well.
vim /var/www/html/info.php
<?php phpinfo(); ?>
Restart Apache service again.
systemctl restart httpd.service
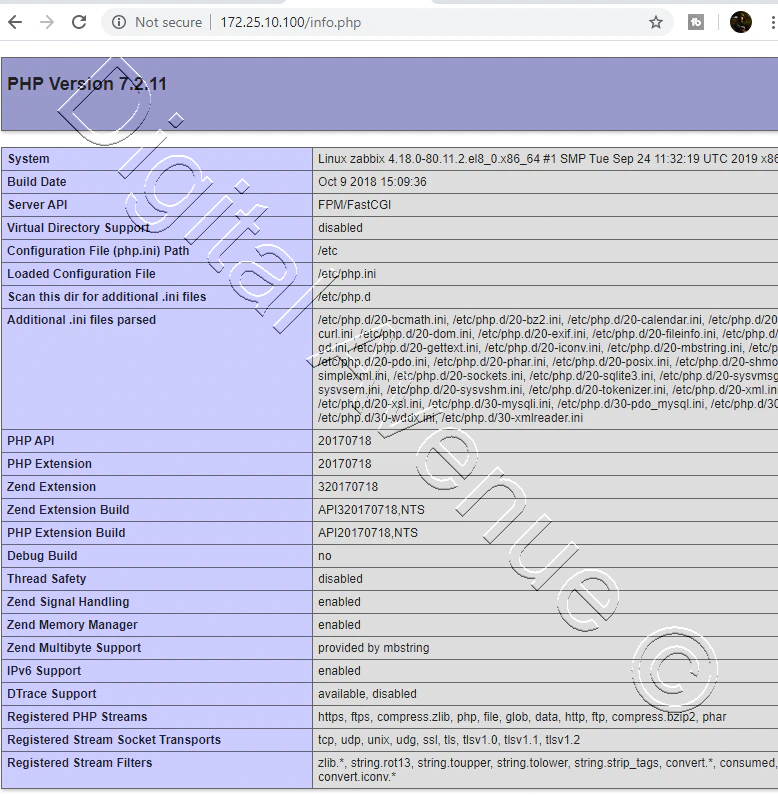
Then, Open the web browser and hit server’s IP address with “info.php”. The you would see a page like this.
http://<your_server_ip_address>/info.php
STEP 04: Install and Configure MariaDB
A. Install MariaDB:
Then, Install MariaDB on our Zabbix hosting server.
yum install mariadb mariadb-server
C. Allow MySQL Service Through The Firewall:
Allow MariaDB/MySQL service through the firewall.
firewall-cmd --permanent --add-service=mysql
firewall-cmd --reload
Start and enable Mariadb/MySQL service on reboot.
systemctl start mariadb.service
systemctl enable mariadb.service
D. MySQL Initial Setup:
MariaDB Initial configuration:
mysql_secure_installation

Set root password? [Y/n] Y

New password:

Re-enter new password:

Remove anonymous users? [Y/n] Y

Disallow root login remotely? [Y/n] Y

Reload privilege tables now? [Y/n] Y
Log into MariaDB Server:
mysql -uroot -p

MariaDB [(none)]> select version();
mysql -V
STEP 05: Create “zabbixdb” database and “zabbixuser” user
A. Create a Zabbix User & Dsatabase:
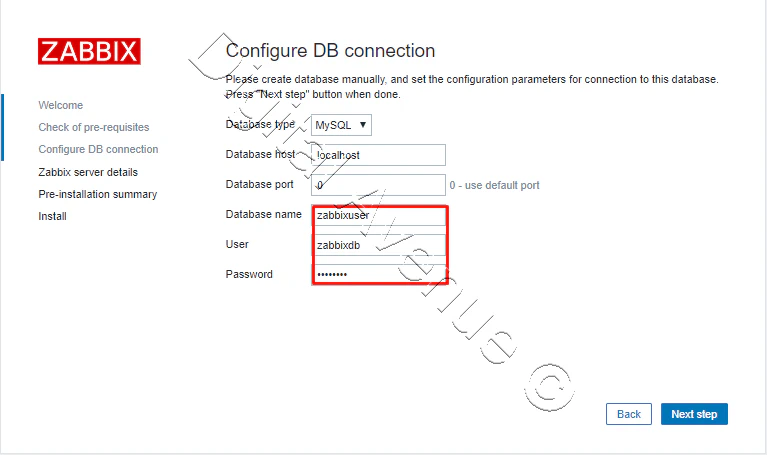
Now, I’m going to create a Zabbix user and a database. In this time, I’m going use “zabbixuser” as a user and “zabbixdb” as a database.
First login into MariaDB/MySQL.
mysql -uroot -p
Enter password:
Then create a database.
CREATE DATABASE zabbixdb CHARACTER SET UTF8 COLLATE UTF8_BIN;
Grant privileges to zabbixuser and zabbixdb with a password.
GRANT ALL PRIVILEGES ON zabbixdb.* to zabbixuser@'localhost' IDENTIFIED BY 'PASSWORD';
GRANT ALL PRIVILEGES ON zabbixdb.* to zabbixuser@'%' IDENTIFIED BY 'PASSWORD';
Refresh permissons.
FLUSH PRIVILEGES;

QUIT;
Now, I have completed the installation of LAMP stack which include Apache, PHP and MariaDB.
Now we can go straight forward to the Zabbix package installation and configuration.
STEP 06: Install & Configure Zabbix Server
First, We need to import PGP trusted signing key.
rpm --import http://repo.zabbix.com/RPM-GPG-KEY-ZABBIX
Next, Install the repository configuration package for the Zabbix.
RHEL8 / CENTOS8
rpm -Uvh https://repo.zabbix.com/zabbix/4.4/rhel/8/x86_64/zabbix-release-4.4-1.el8.noarch.rpm
RHEL7 / CENTOS7
rpm -Uvh https://repo.zabbix.com/zabbix/4.4/rhel/7/x86_64/zabbix-release-4.4-1.el7.noarch.rpm
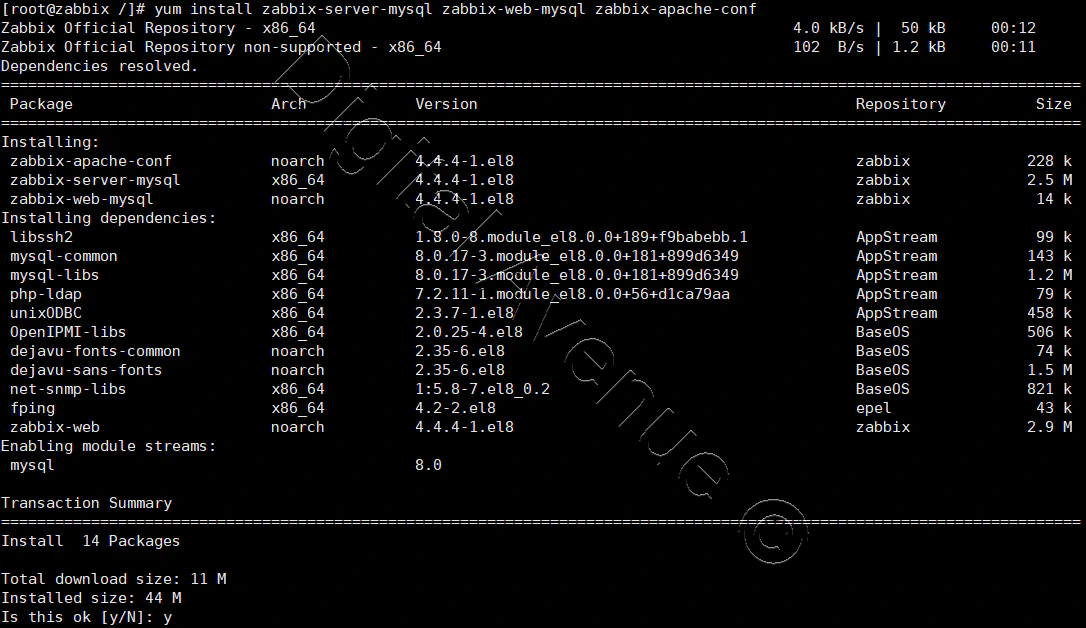
Then, Install Zabbix Server.
yum install zabbix-server-mysql zabbix-web-mysql zabbix-apache-conf
Finally, Import Zabbix server database schema.
zcat /usr/share/doc/zabbix-server-mysql/create.sql.gz | mysql -uzabbixuser -pPASSWORD zabbixdb
NOTE: This may take a while to import the database schema. So, Please wait untill it done.
Configure Zabbix Server:
Let’s headover to Zabbix server main configuration file which located in “/etc/zabbix/zabbix_server.conf” and do these changes.
vim /etc/zabbix/zabbix_server.conf
In here you need to Zabbix server’s IP address, MySQL or MariaDB username and password
## DATABASE NAME
DBName=zabbixdb

## DATABASE USERNAME
DBUser=zabbixuser

## DATABASE PASSWORD
DBPassword=PASSWORD
Allow Zabbix Service Through The Firewall:
firewall-cmd --permanent --add-port=10050/tcp
firewall-cmd --permanent --add-port=10051/tcp
firewall-cmd --reload
Set Zabbix server name:
vim /etc/httpd/conf/httpd.conf
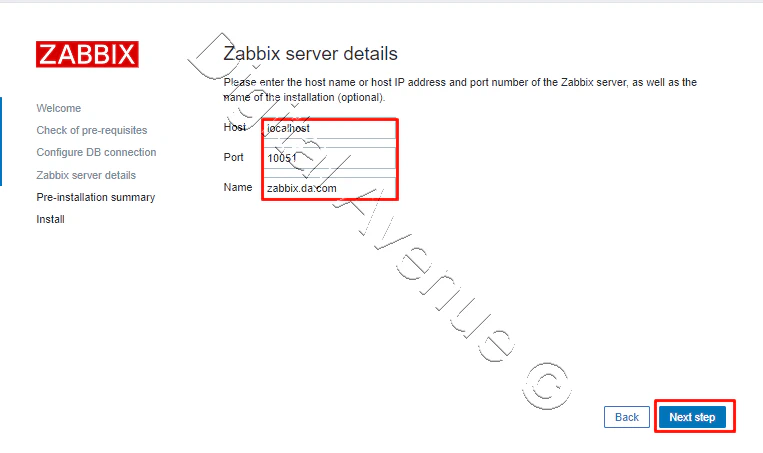
ServerName zabbix.da.com:80

ServerAdmin zabbix@da.com
systemctl restart httpd.service
Configure PHP for Zabbix Frontend:
Let’s move to Zabbix server’s Apache configuration file.
vim /etc/httpd/conf.d/zabbix.conf
Some PHP values has be configured. These values you may be need to change later when your requirements getting higher. It depends on your Zabbix server where you going to use. Don’t forget to uncomment and set your Time Zone.
vim /etc/httpd/conf.d/zabbix.conf
Allow from All
php_value max_execution_time 600
php_value memory_limit 1024M
php_value post_max_size 32M
php_value upload_max_filesize 32M
php_value max_input_time 600
php_value max_input_vars 10000
php_value always_populate_raw_post_data -1
php_value date.timezone Asia/Colombo
Start & enable service to start at system boot.
sudo systemctl enable zabbix-server
sudo systemctl restart zabbix-server
STEP 07: Further SELinux Configuration For Zabbix
If your SELinux configuration is still on “enforcing” mode. then you need to execute these commands to make connection between Zabbix frontend and the server.
setsebool -P httpd_can_connect_zabbix on
STEP 08: Restart & Enable All Services Again.
Now, You I’ll enable & restart all services once.
systemctl enable httpd.service mariadb.service zabbix-server.service
systemctl restart -l  httpd.service mariadb.service zabbix-server.service
And Check whether they are running well.
systemctl status -l httpd.service mariadb.service zabbix-server.service
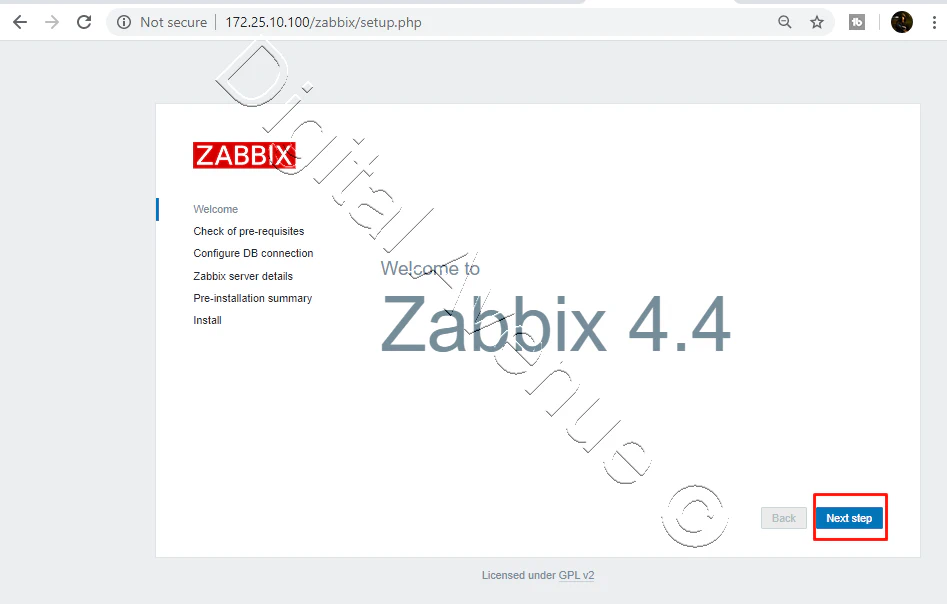
Now, We are almost ready to complete the Zabbix server setup. Let’s Head over to the web browser and enter Zabbix server’s IP address with the “zabbix” suffix. and hit enter.
http://zabbix_server_IP/zabbix/
For the first time you may need to log into the system using default username and password.
Default Zabbix Username: Admin
Default Zabbix Password: zabbix
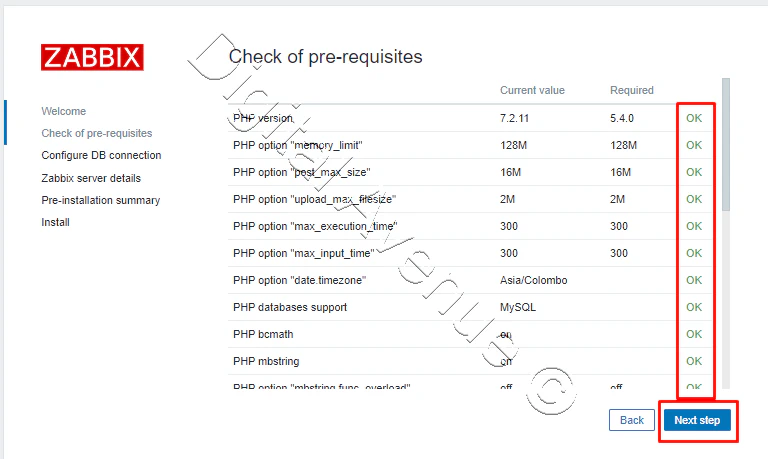
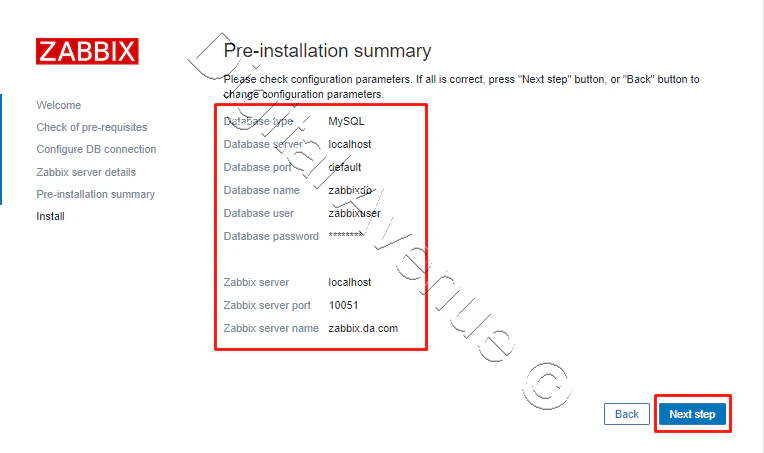
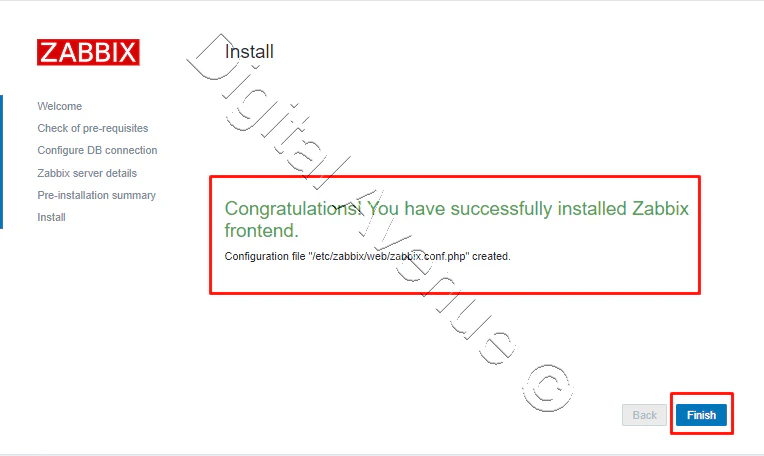
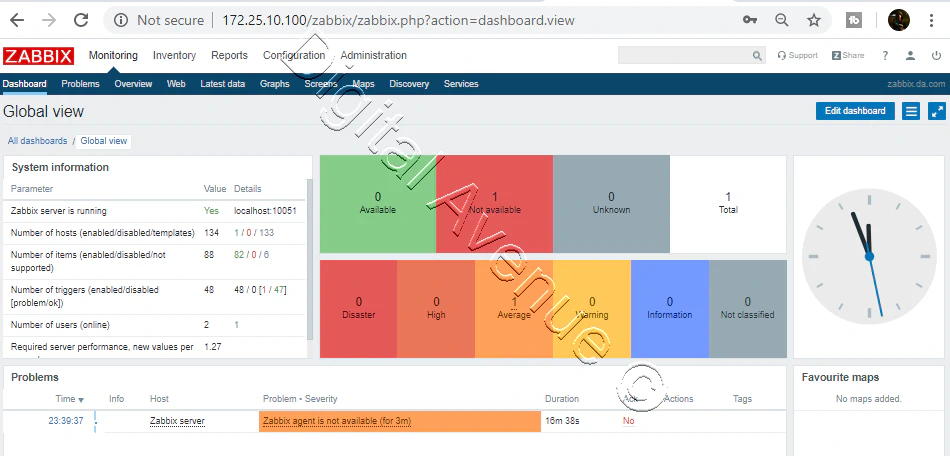
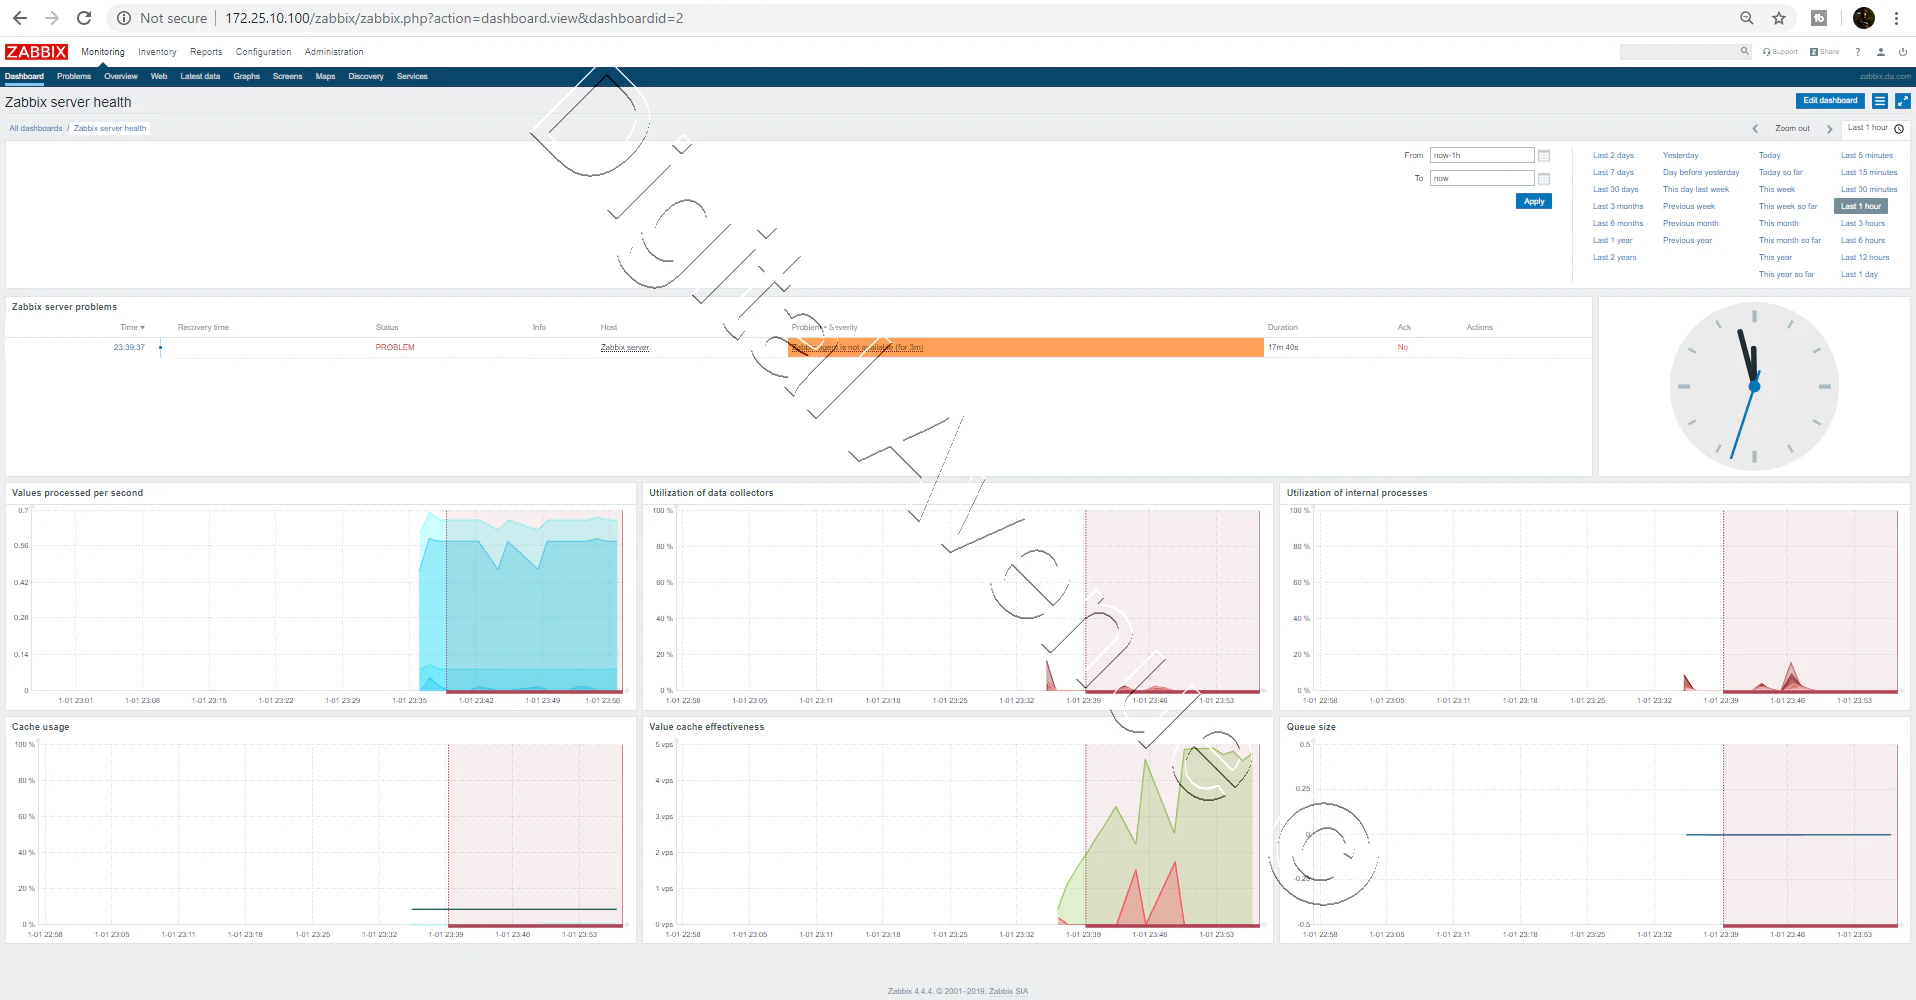
Then, follow the instruction as seen on installation wizard.
Deploy Production Grade Kubernetes Cluster on Azure AKS
Introduction This tutorial is intended to demonstrate how to setup your 1st Kubernetes cluster on Azure Kubernetes Services (AKS). This tutorial will cover up all the steps that you need to setup complete AKS cluster.
Getting Started With Docker - Quick Start Guide
Getting Started With Docker - Quick Start Guide Docker Engine Platform as a Service (PaaS) Cloud platform service. Allows you to manage its application and data.
How To Run Microsoft SQL Server On Kubernetes - Azure Kubernetes Service
Prerequisites: Azure CLI https://docs.microsoft.com/en-us/cli/azure/install-azure-cli 1. Run the Azure CLI with the az command. 1.1 Run the login command. az login Login in the browser with the azure account.

