How To Setup Intrusion Detection Using Snort on PfSense
Snort is an intrusion detection and prevention system. Snort protects your network against hackers, security threats such as exploits, DDOS attacks and viruses.
Snort detects attack methods, including denial of service, buffer overflow, CGI attacks, stealth port scans, and SMB probes
Snort monitors network traffic and analize against a predefined rules. Then catagorized network attack. Finally, Sonrt involks actions against matching rules.
In this case you should consider deploying intrution detection and prevention system to detect and protect your network from attackers.
STEP 01: Install Snort
Now Let’s start to install Snort package.
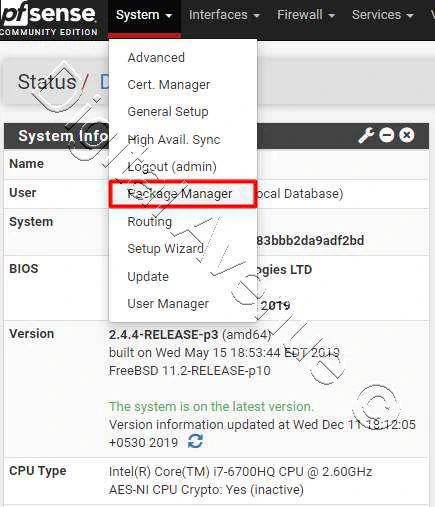
Headover to…
System > Package Manager > Available Packages
Search for a package named “snort”
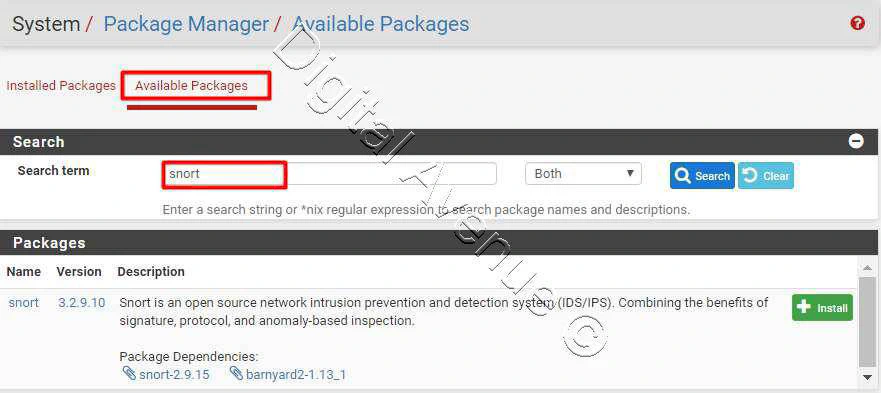
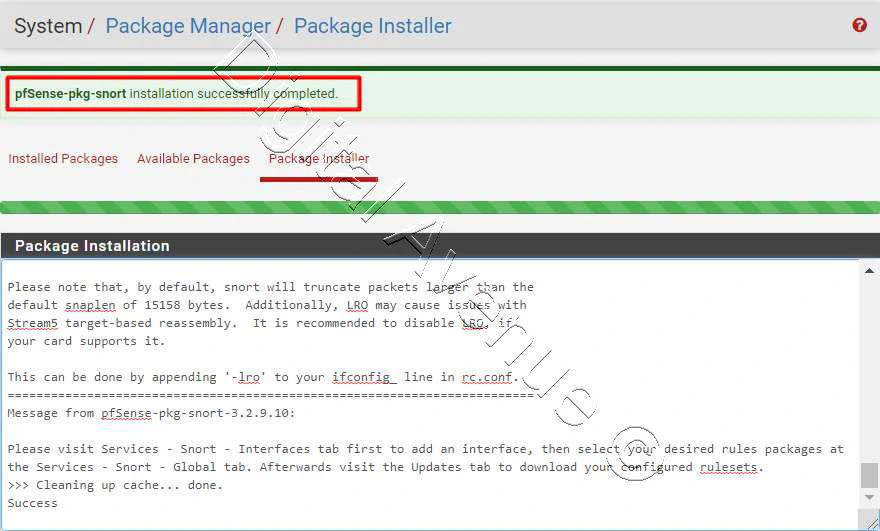
Hit the Install button & then confirm the installation to proceed.
It grabs required repos from pfsense repositories.
STEP 02: Configure Snort Global Settings
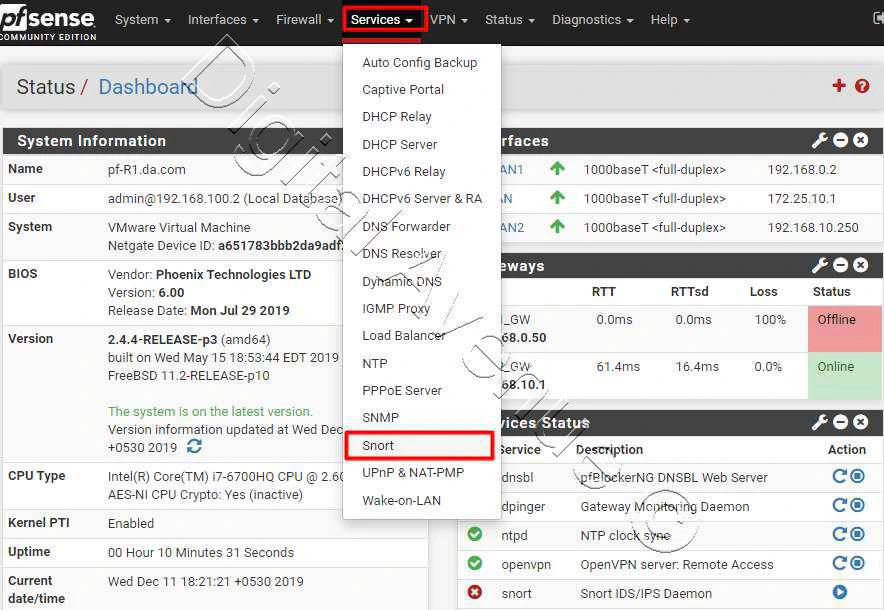
Services > Snort > Global Settings
To setting up Snort for the first time, We need to head over to “Global Settings” tab and enable required rule sets to be downloaded.
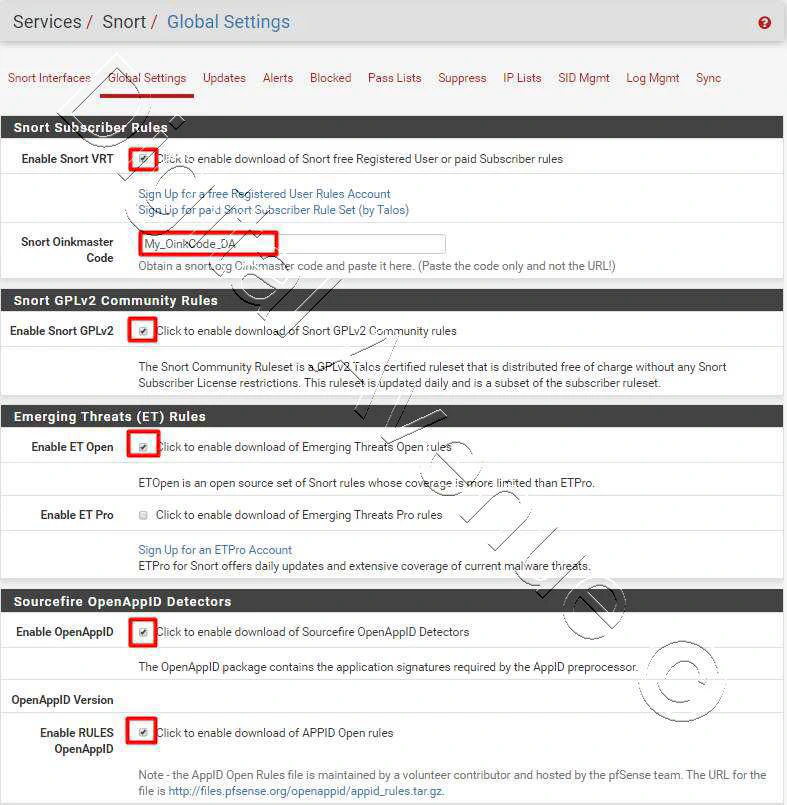
Enable Snort VRT
- Snort VRT : Enabled

Either you can sign up as a free user or paid user. After you singed up, you will get a “snort OinkMaster Code”
First of all you’ll need to get registered on www.snort.org . They will provide a unique code after the registration.
Now I’m going to sign up for a free account.
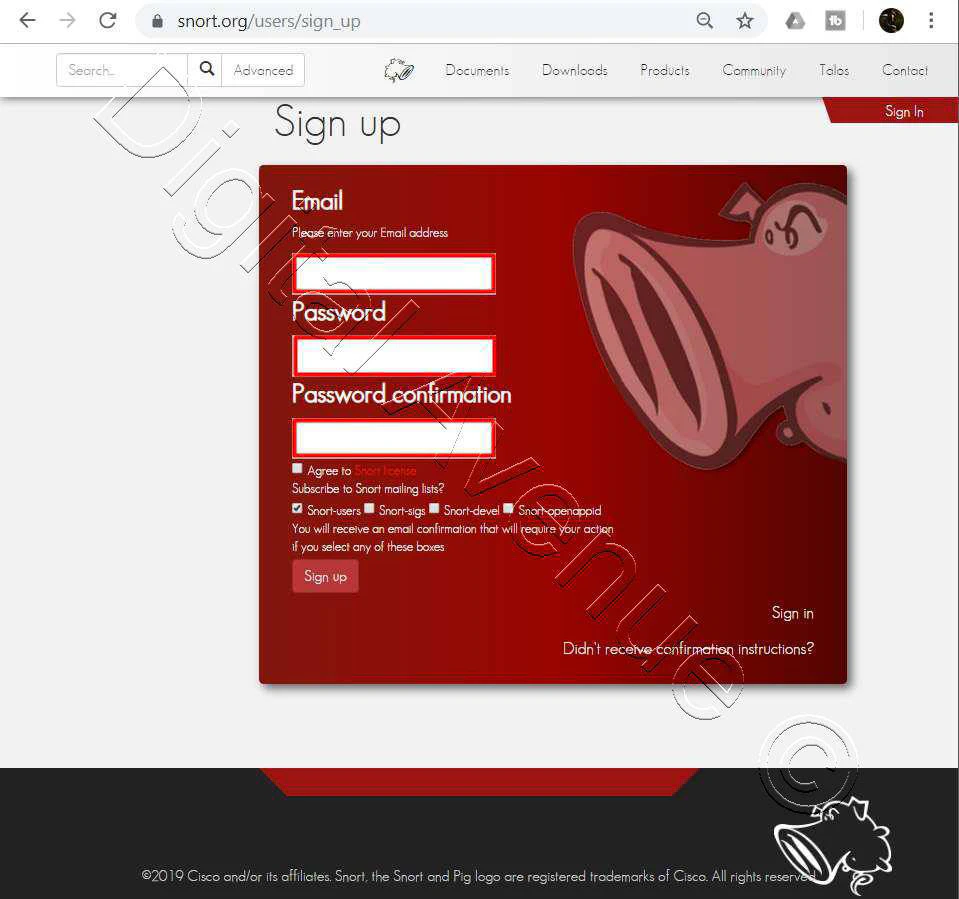
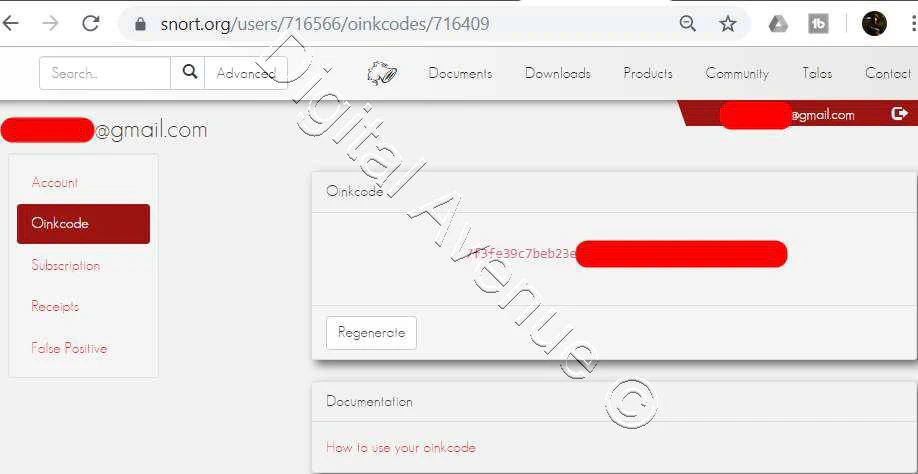
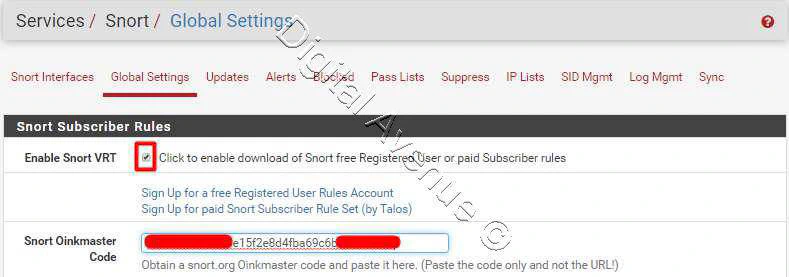
They have thousands of pre defined rule sets. These, rules are the source for the Snort System.
Phase the Oinkmater Code in the “Snort Oikmaster Code” In order to download the free Snort rule sets.
This rule databases update every 24hrs..
And also can use Snort GPLv2 Community Rules and the Emerging Threats (ET )Open Rules freely. You don’t need to register to use them.
In here we can enable both of them as well.
- Snort GPLv2 : Enabled
- Emergin Threats (ET) Open : Enabled
- OpenAppIP : Enabled
- RULES OpenAppID : Enabled
Application detection (AppID)
OpenAppID detector rules enables application detection and filtering facility to the Snort.
OpenAppID has an ability to look at the application layer. Which is Layer 7. Which can look at the applications which running in the system.
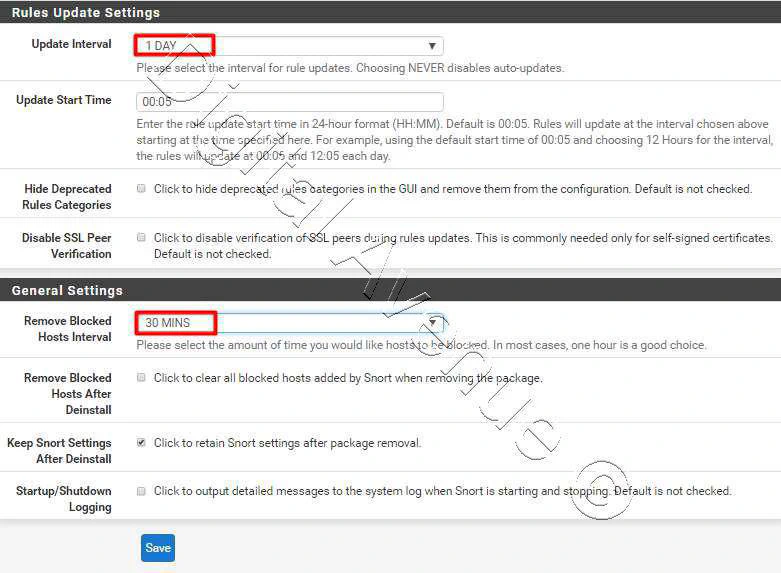
Rules Update Settings
Here I’m going to set the update interval into a one day.
- Update Interval : 1 Day
General Settings
Set a reasonable time for “Remove Blocked Hours Interval”. In here I’ll set 30mins.
- Remove Blocked Hours Interval : 30 Mins
If someone did nasty thing in your network. That device will automatically will be blocked by the system. Then, Either you need to unblock that device manually or 30mins after it will ublocked automatically.
Now, Hit the “Save” button.
STEP 03: Update Snort Rule Databases
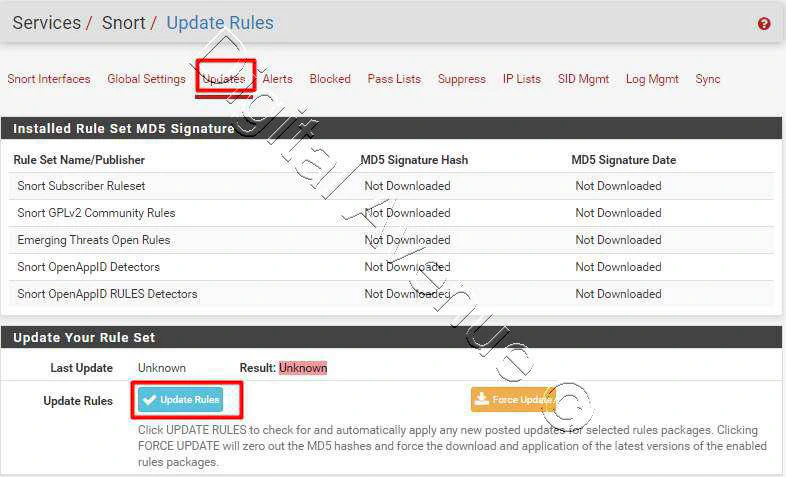
Now head over to Update tab and hit the “Update Rules” button to download the latest updates.
System > Snort > Update Rules
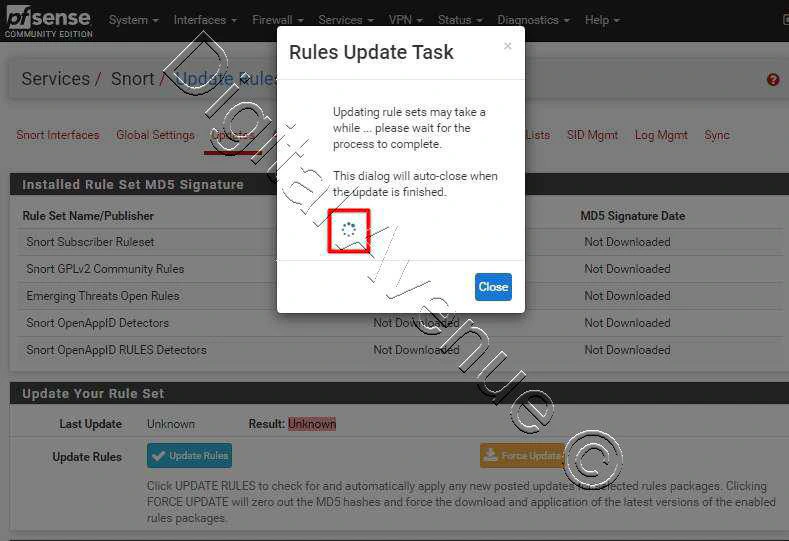
It will download all required rules automatically. Initially this take a little logner time. wait untill it completed.
STEP 04: Add Snort To an Interface
Then we need to add a WAN interace to “Snort Interface” sections. Now, let’s move to “Snort Interfaces” tab and add new Snort interface.
Goto “Services” menu and select Snort, Then select Interface tab.
Services > Snort > Interfaces
Snort Interfaces > Add New Interface

- Enable Interface
- Always selecet WAN Interface
- Provide a Description
- Send Alterts to System Logs
- Block Offenders : Enabled
- Search Optimize: Enable search optimization
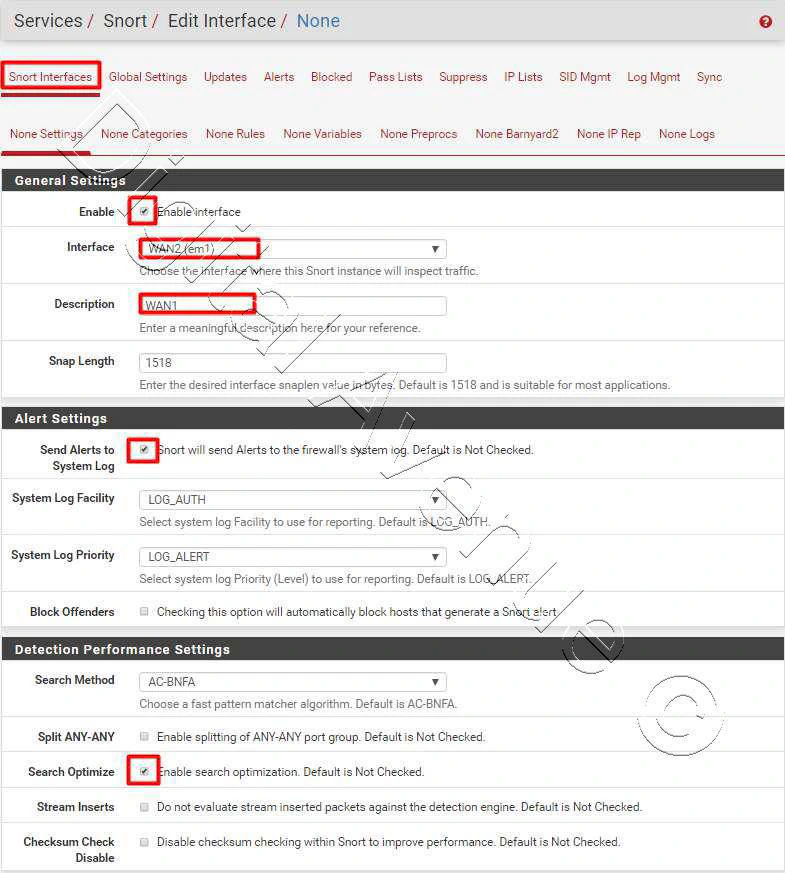
And finally hit save

STEP 05: Select Which Types of Rules Will Protect The Network
Head over to “Interfaces” and Select an configured interface, hit the edit button. And move to “WAN Categories” tab.
Services > Snort > Edit Interface> WAN2
Snort VRT IPS Policy Selection
- User IPS Policy : Enabled
- IPS Policy Selection : Security
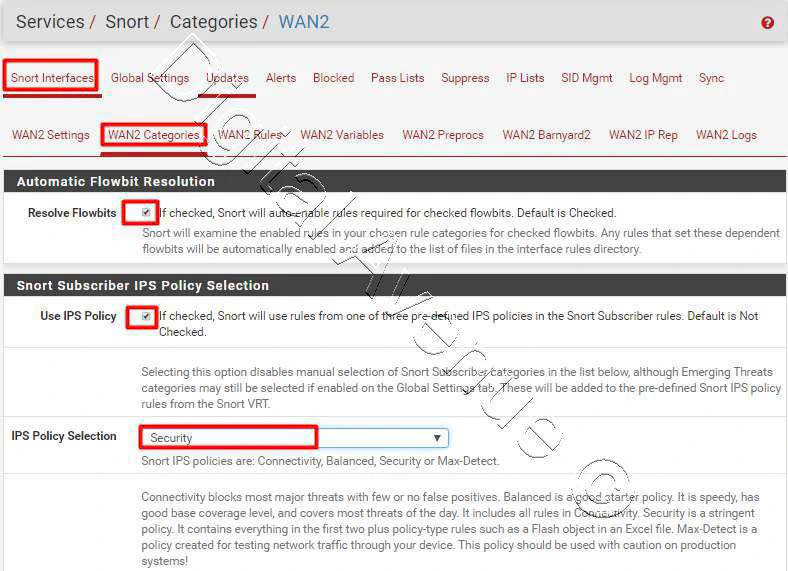
If you are not familiar with the Snort, I recommend you to use “Connectivity” option as a starting point.
In here I’m going to use “Security” as my IPS Policy.
And also you can enable and select other rule sets such as GPL Community Rules, ET Open Rules and Open AppID Rules.
Select the rule-sets what ever you need. At this point, I’m going to enable the all ET Rules for the demostration purpose.
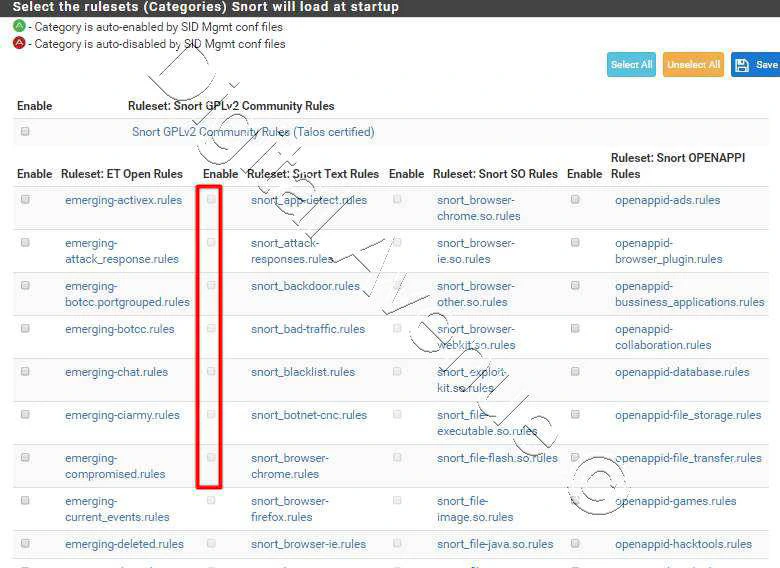
Ignore rest of other settings below.
Move down further and hit the “Save” button.
STEP 06: WAN Pre-processor Configuration
Now, I’m going to configure Snort further. Let’s, head over to…
Services > Snort > Snort interfaces > WAN Pre-Processes
Enable “Performance Stats” option if you want to have logging in depth details.
Enable Performance Stats : If you wanna have logging in depth details through the rules.
Auto Rule Disable : Enabled
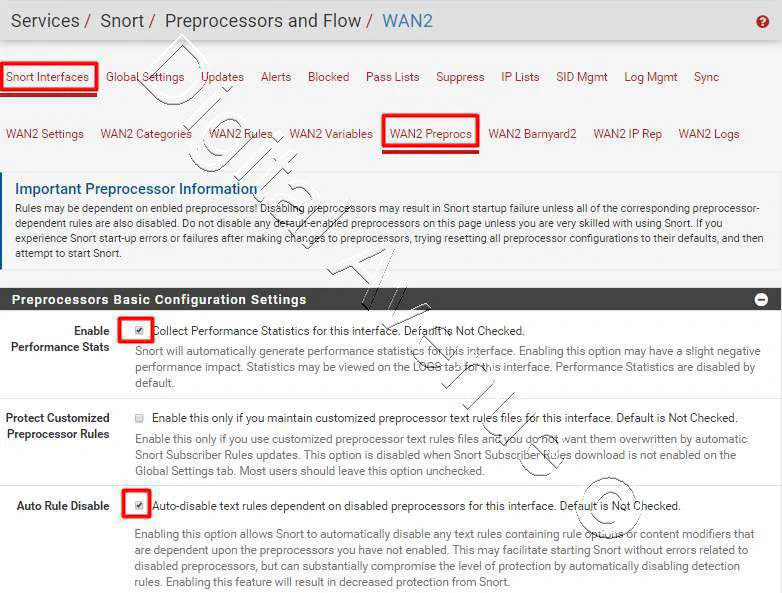
Move down further and go to…
Application ID detection with OpenApp ID:
- Application ID Detection: Enabled
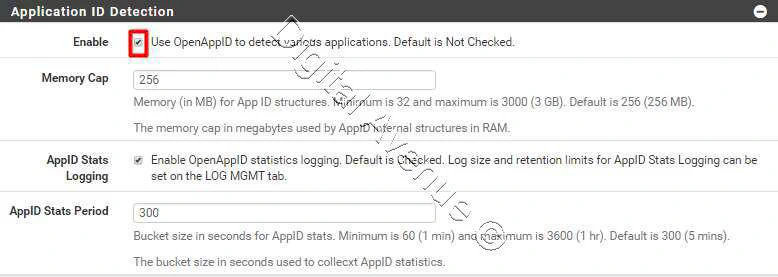
Enable “Application ID Detection”. And double check both check-boxes to enable detectors and rules download for “Source fire OpenAppID Detection” section in the Global Settings.

Better, If rest of settings leave as it is…
Then, Hit save
Make sure to “Update” Once again after the AppID enabled.
STEP 07: View Detected Apps
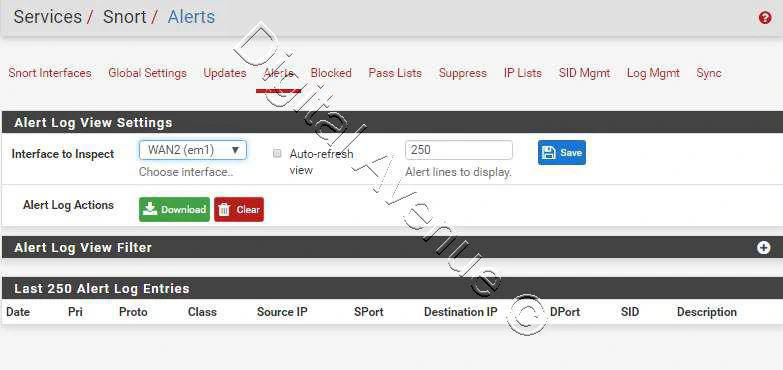
Then, We need to know how to view Snort Alters.
Now move to “Alerts” tab to view the detected applications.
At this time we don’t have any alters, but I’ll show you after the Snort service started.
STEP 08: Start Snort Service
Let’s head-over to
Services > Snort > Interfaces
and click on the small play button. Then it will start the service on the WAN interface.
At this time you will notice, These are considarable resources are using by Snort service. Better if you are consider upgrading pfSense box hardware resources if it is pron to resource hungry when the Snort service starts.
STEP 09: Getting to know the alerts
All the Snort logs will be recorded in the General Logs section.
Status > System Logs
Also you can use “Alerts” tab to view alerts generated by the Snort.
Service > Snort > Alerts
STEP 10: Managing blocked hosts
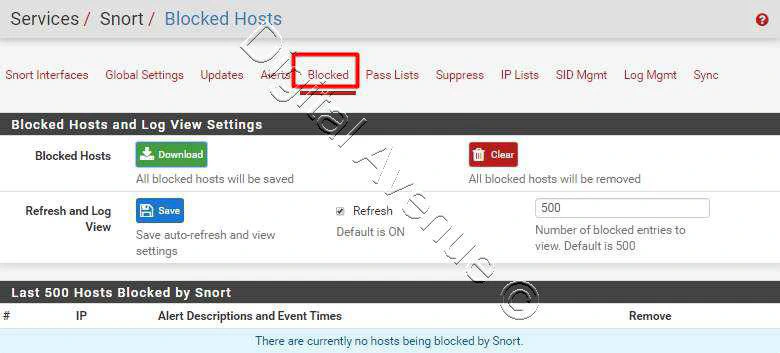
Now, Move to Service > Snort > Blocked Hosts
The “blocked” tab shows that hosts are currently being blocked by Snort.
Before that, Make sure that you have enabled “Block Offenders” option in the selected “interface Settings” tab.
Also you can see what events has been blocked by Snort.
In here you can see most of activities going on now.
STEP 11: Managing Pass lists
Now, Let’s move to the…
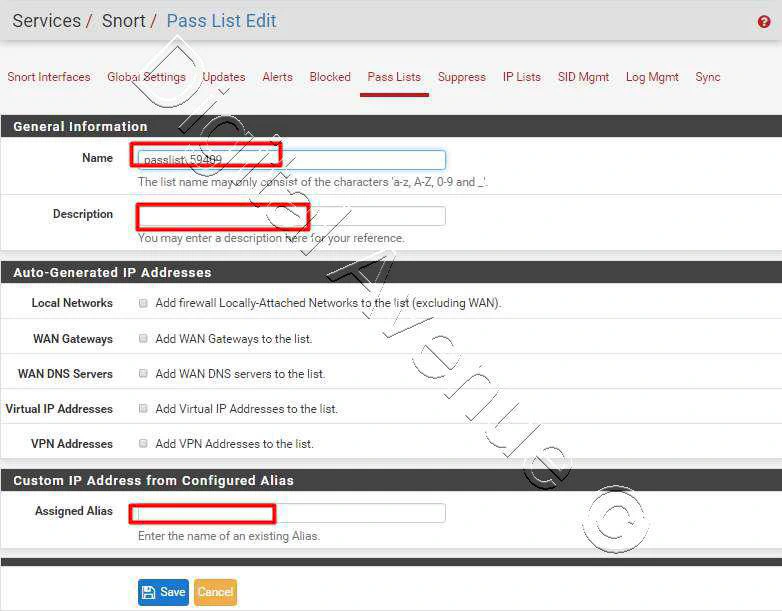
Services > Snort > Pass List
tab.
“Pass Lists” are lists of IP addresses that Snort should never blocked by Snort.
In here you can add or define “Firewall Aliases” to bypass the Snort.
Bottom Line:
Snort on pfSense bit resource hungry application. therefore, You may need to upgrade your hardware resources on pfsense box.
Check the resource utilization before implemented on a production environment.
OK, Now you may have some idea and knowledge to playing around with the Snort Intrusion Detection Service. Hope this helps you to keep your network away from unwanted attackers.
Finally, Please don’t forget to Like, Comment and hit the Subscribe for video guides like this. See you from a new video.
REF:
https://pfsense-docs.readthedocs.io/en/latest/ids-ips/setup-snort-package.html
https://turbofuture.com/internet/How-to-Set-Up-an-Intrusion-Detection-System-Using-Snort-on-pfSense-20
https://community.spiceworks.com/how_to/126207-set-up-snort-on-pfsense-for-ids-ips
https://linoxide.com/firewall/install-configure-snort-pfsense-firewall/
https://vorkbaard.nl/installing-snort-for-idsips-on-pfsense-2-4/
Deploy Production Grade Kubernetes Cluster on Azure AKS
Introduction This tutorial is intended to demonstrate how to setup your 1st Kubernetes cluster on Azure Kubernetes Services (AKS). This tutorial will cover up all the steps that you need to setup complete AKS cluster.
Getting Started With Docker - Quick Start Guide
Getting Started With Docker - Quick Start Guide Docker Engine Platform as a Service (PaaS) Cloud platform service. Allows you to manage its application and data.
How To Run Microsoft SQL Server On Kubernetes - Azure Kubernetes Service
Prerequisites: Azure CLI https://docs.microsoft.com/en-us/cli/azure/install-azure-cli 1. Run the Azure CLI with the az command. 1.1 Run the login command. az login Login in the browser with the azure account.


