How to Install Nagios Core 4.4 Server on CentOS7 RHEL7
Introduction:
Nagios is a industry slandered IT infrastructure monitoring solutions. Which is one of the most popular, open source , powerful server and network monitoring system. It enables organizations to identify and resolve IT infrastructure problems before they affect critical business processes. Nagios has the capability of monitoring application, services with an entire IT infrastructure.
Which can monitor host resources such as CPU Load,CPU Usage, DISK Throughput, Disk Iops, Network Speed, Network Throughput and finally trigger an alert via email.
LAB SETUP
| Host | IP |
|---|---|
| Nagios 4 Server | 172.25.10.50 |
| Client | 172.25.10.100 |
| OS / Package | Version |
|---|---|
| CentOS - Nagios Server | 7 |
| CentOS - Client Host | 7 |
| Nagios Core | 4.4.5 |
| Nagios Plugin | 2.2.1 |
| NRPE Package | 3 |
SERVER SIDE CONFIGURATIONS
STEP 01: Complete Prerequisites
A. SELinux Configuration:
SELinux need to disabled & set it into permissive mode.
sed -i 's/SELINUX=.*/SELINUX=disabled/g' /etc/selinux/config
setenforce 0
Initially, We need to have a freshly installed CentOS7 / RHEL7 operating system.
B. Update an Operating System.
yum -y update
C. Install Required Packages.
Now, We need to install Apache, PHP, SNMP and some other packages.
yum install -y gcc glibc glibc-common wget unzip httpd php gd gd-devel perl postfix net-snmp
STEP 02: Install Nagios Core
A. Download Nagios Core Source Package.
Create a download directory. And download Nagios Core version 4.4 into that directory.
mkdir /nagios
cd /nagios

wget -O nagioscore.tar.gz https://github.com/NagiosEnterprises/nagioscore/archive/nagios-4.4.5.tar.gz
Extract nagios source package.
tar xvzf nagioscore.tar.gz
B. Compile Nagios Package.
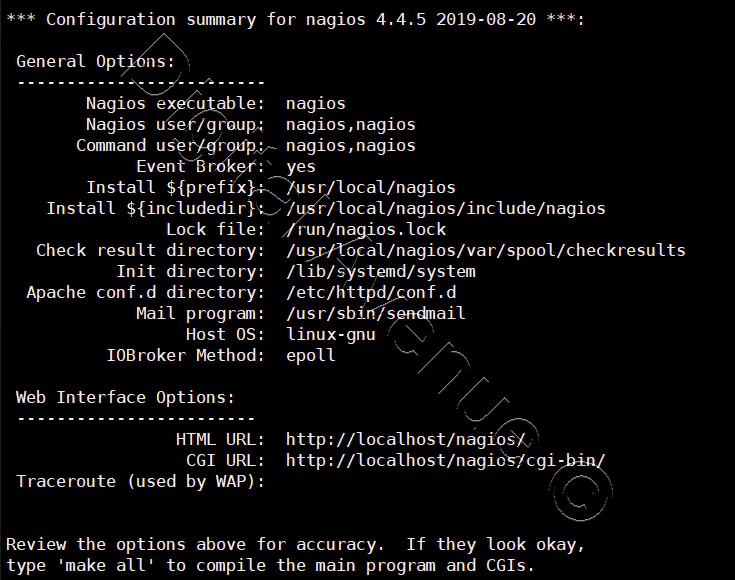
Configure Nagios settings.
cd /nagios/nagioscore-nagios-4.4.5/

./configure
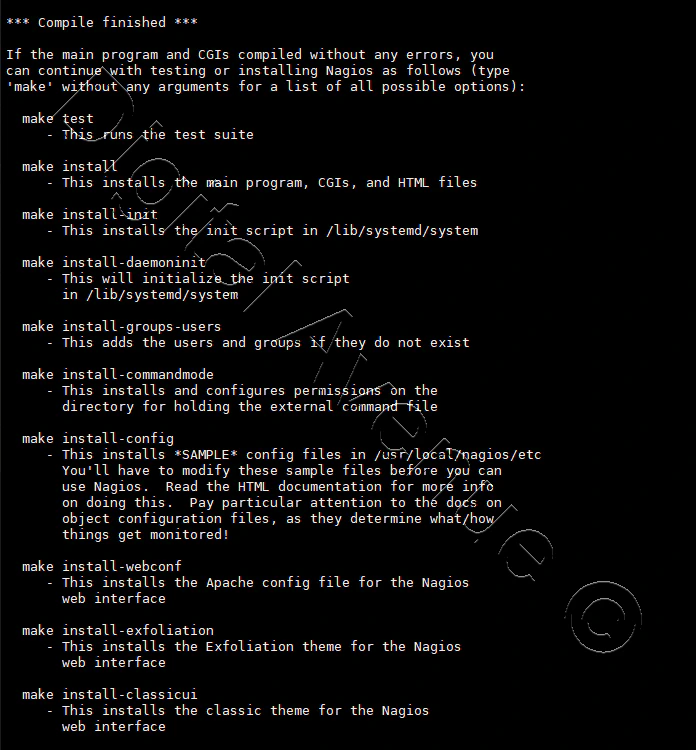
C. Compile the Main Program & CGIs.
make all
D. Create Nagios User & Group.
This adds the users and groups if they do not exist This will creates a user and a group named “nagios”. The apache user is also added to the nagios group.
make install-groups-users

usermod -a -G nagios apache
E. Install the Main Program, CGIs and HTML files.
make install
H. Setup Services & Daemons.
make install-init
I. Install Service / Daemon
This installs the service or daemon files and also configures them to start on boot.
make install-daemoninit
J. Set Permissions on the External Commands Directory.
make install-commandmode
K. Install Sample Config Files.
This installs SAMPLE config files in /usr/local/nagios/etc You’ll have to modify these sample files before you can use Nagios.
make install-config
L. Install Apache Configs For Nagios Web Interface.
make install-webconf
M. Install Nagios Interface Theme.
This installs the Exfoliation theme for the Nagios web interface.
make install-exfoliation
M. Firewall Configuration.
Allow inbound traffic via tcp port 80.
firewall-cmd --zone=public --add-port=80/tcp --permanent
firewall-cmd --reload
O. Create “nagiosadmin” User Account.
htpasswd -c /usr/local/nagios/etc/htpasswd.users nagiosadmin
P. Start & Enable Apache Web Server.
Enable service to start automatically while system boot.
systemctl start httpd.service
systemctl enable httpd.service
Q. Enable & Start Service
systemctl enable nagios.service
systemctl restart nagios.service
Q. Accessing the Nagios Web Interface
Now, Nagios Core server installation and configuration has been completed.
Now you can log into the Nagios Web Interface through the web browser.
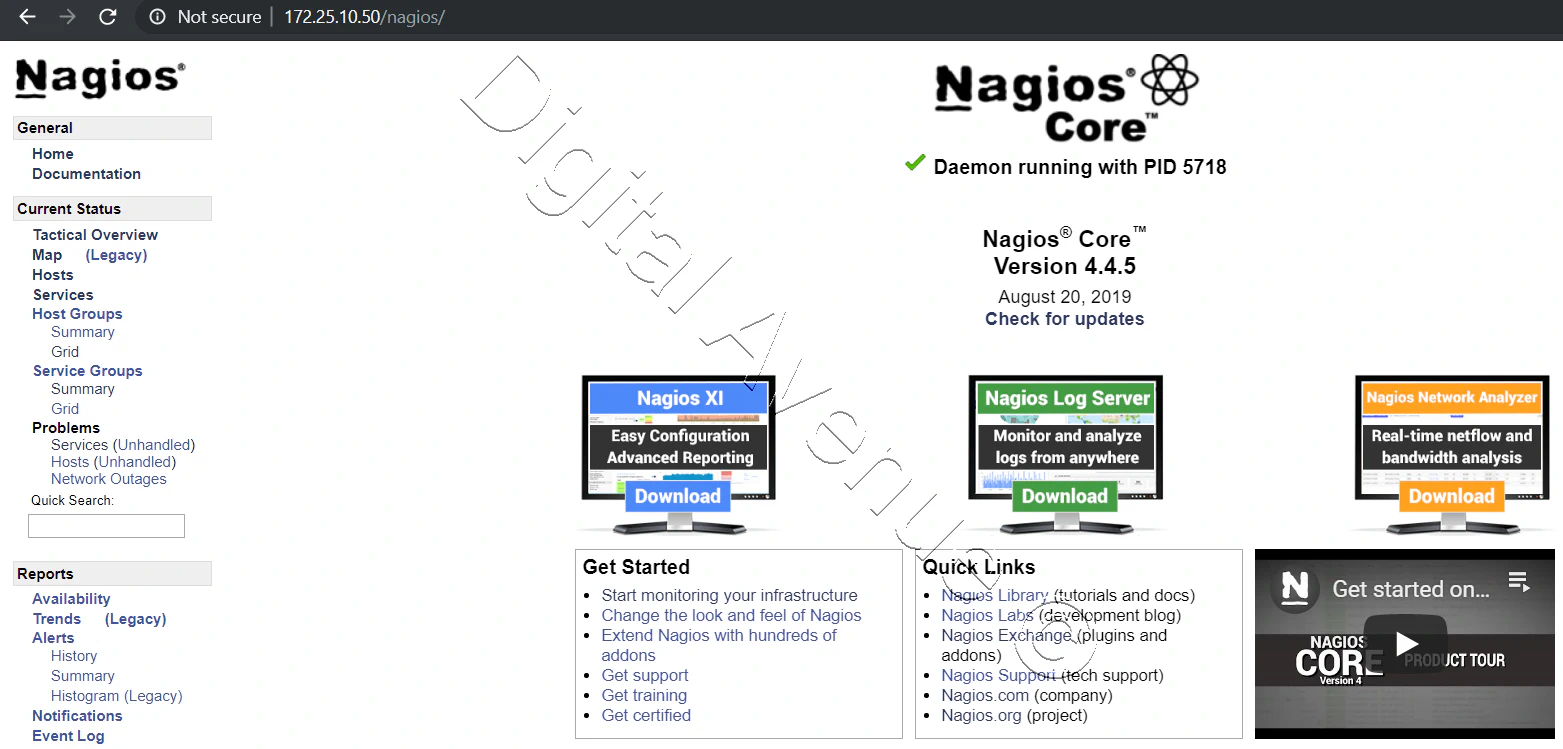

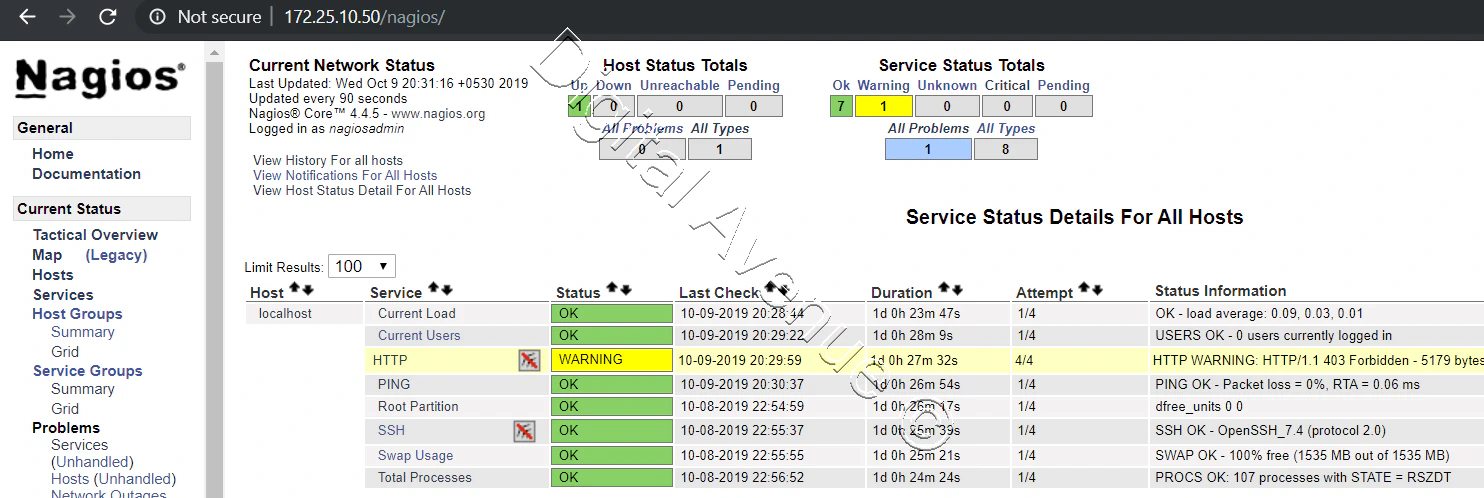
Note: You will notice there some error unders the hosts & service,Eventhough We have installed Nagios Core.
(No output on stdout) stderr: execvp(/usr/local/nagios/libexec/check_load, ...) failed. errno is 2: No such file or directory
These errors wiil be resoloved once you installed nagios pluings.
STEP 04: Installing Nagios Plugins From YUM Repository
A. Install Prerequisites
yum install -y gcc glibc glibc-common make gettext automake autoconf wget openssl-devel net-snmp net-snmp-utils epel-release
yum install -y perl-Net-SNMP
B. Install Nagios Plugins
yum -y install nagios-plugins-all
C. Copy plugins if not available in the directory.
cp /usr/lib64/nagios/plugins/check_* /usr/local/nagios/libexec/
STEP 05: Restart Nagios, Apache and NRPE Servers
systemctl restart nagios httpd nrpe
STEP 06: How To Install NRPE v3 From YUM Repository
A. Install Prerequisites
yum install -y gcc glibc glibc-common openssl openssl-devel perl wget
B. Install Latest EPEL Repository And System Updates
Install Latest EPEL YUM Repository
yum -y install https://dl.fedoraproject.org/pub/epel/epel-release-latest-7.noarch.rpm
yum -y update
C. Install (NRPE v3) Nagios Remote Plugin Executor
yum -y install nrpe
D. Allow NRPE service Port Through the Firewall
[root@nagios /]# firewall-cmd --permanent --add-port=5666/tcp
[root@nagios /]# firewall-cmd --reload
F. Enable NRPE Service To Start at Boot
systemctl enable nrpe.service
systemctl restart nrpe.service

Deploy Production Grade Kubernetes Cluster on Azure AKS
Introduction This tutorial is intended to demonstrate how to setup your 1st Kubernetes cluster on Azure Kubernetes Services (AKS). This tutorial will cover up all the steps that you need to setup complete AKS cluster.
Getting Started With Docker - Quick Start Guide
Getting Started With Docker - Quick Start Guide Docker Engine Platform as a Service (PaaS) Cloud platform service. Allows you to manage its application and data.
How To Run Microsoft SQL Server On Kubernetes - Azure Kubernetes Service
Prerequisites: Azure CLI https://docs.microsoft.com/en-us/cli/azure/install-azure-cli 1. Run the Azure CLI with the az command. 1.1 Run the login command. az login Login in the browser with the azure account.

