Setup Remote VPN Access Using PfSense and OpenVPN
Pfsense is a great firewall solution. Very reliable and comes with built in VLAN and VPN support. In this tutorial I’m going to demonstrate how to setup a user authenticated OpenVPN server in PfSense. In this guide I assume you already have a functional pfSense firewall running.
STEP 1: - Open OpenVPN Wizard
A. Create a Virtual Machine for Pfsense


Select OpenVPN Authentication Backed Type
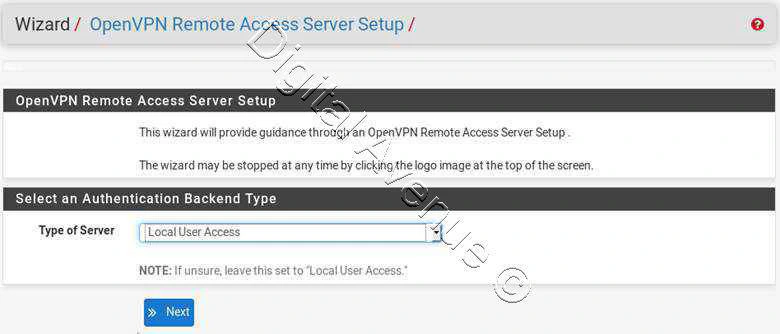
In this tutorial I have used “Local User Access” as the authenticated backed type.
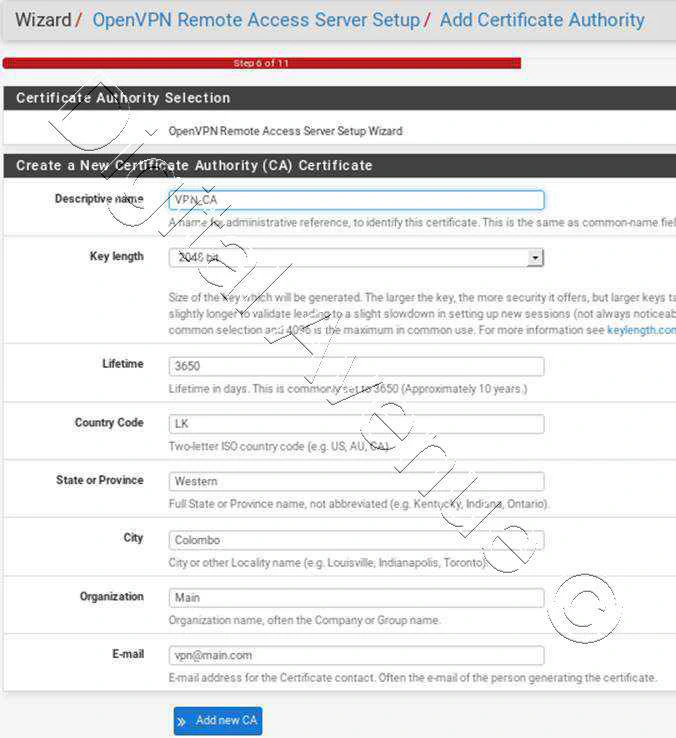
STEP 2:- Create New CA
Create a Certificate Authority to generate certificates for the OpenVPN server.
Fill out the following fields to create a new CA.
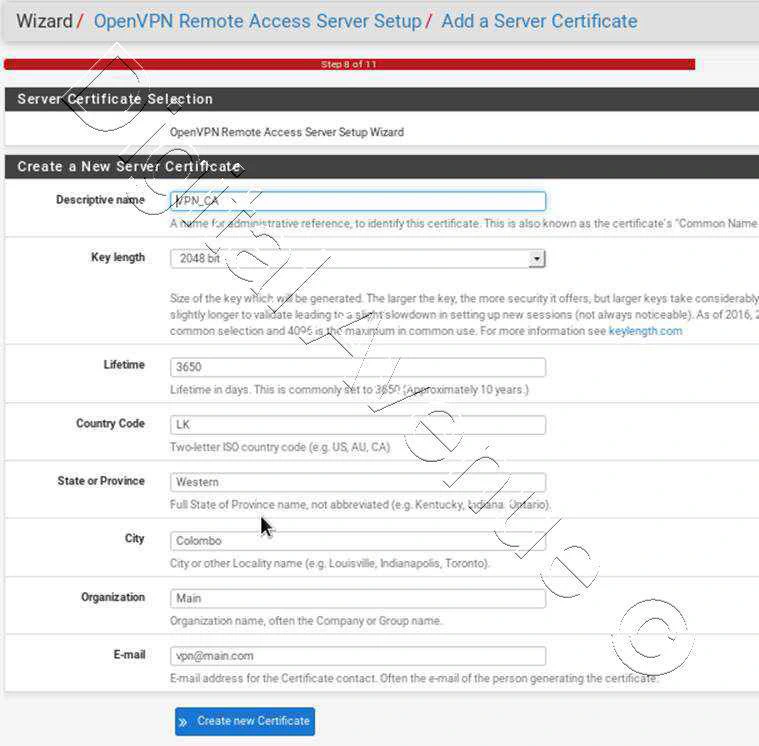
STEP 3:- Create Server Certificate
Create a Server Certificate from the CA for OpenVPN.
STEP 4:- OpenVPN Genaral Settings Configuration
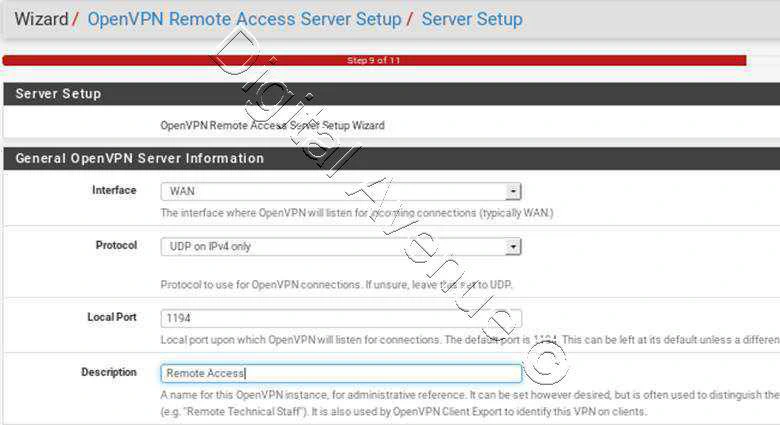
In this case OpenVPN interface will listen on external facing WAN interface which is connected to the internet.
Interface: WAN
Protocol: UDP on IPv4 Only
LocalPort: 1194
Description: VPN

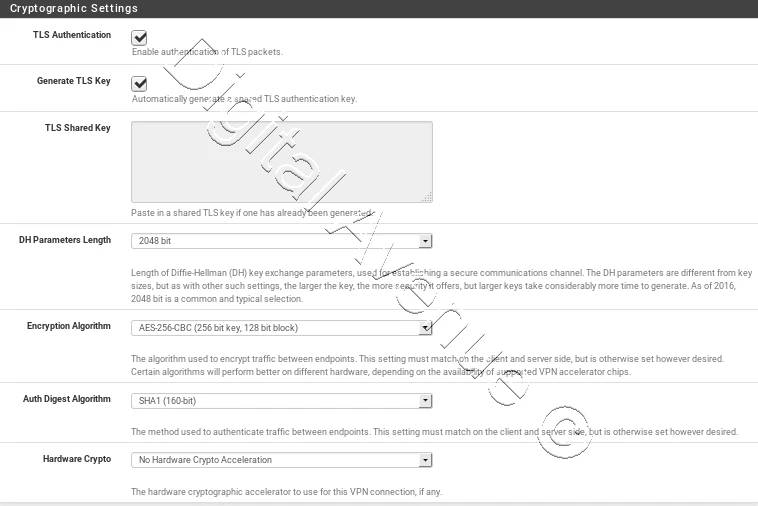
Cryptographic Settings Configuration
This section can be left default or change it upon your security needs.
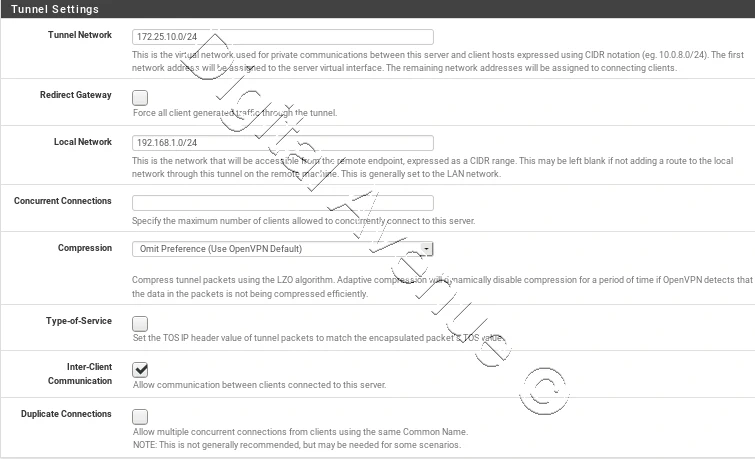
STEP 5:- OpenVPN Tunnel Configuration
There are two important sections.
Tunnel Network
The tunnel networl should be a new network that does not currently exist on the network or the Pfsense firewall routing table.
When client connect to the VPN they will receive an address in this network.
Ex: 172.25.0.10/24
Local Network
Enter the network address of that client will connect to local network. Network address that Pfsense box resides.
Rest of the settings can be change according to your requirement.
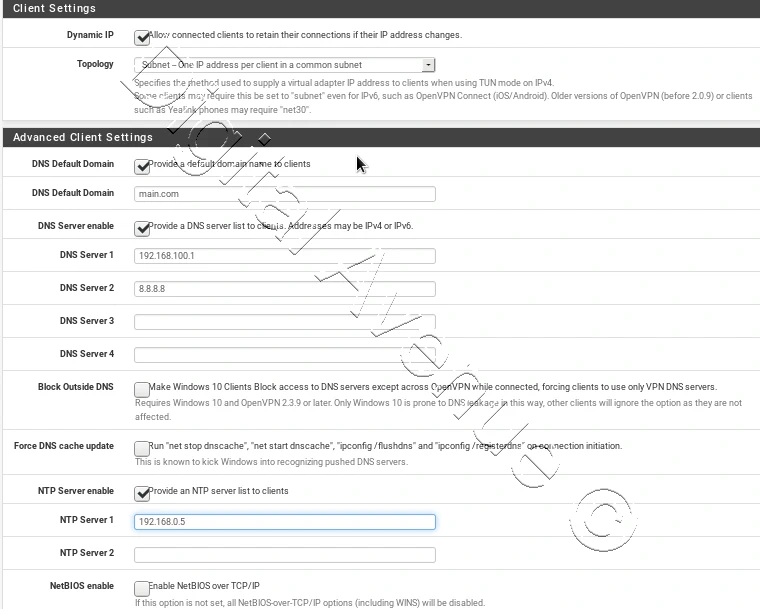
STEP 6:- OpenVPN Client Settings
The settings in the client settings section will be assigned to OpenVPN clients when they connect to the network.
If you are also using pfSense as your local DNS server, you would enter them here. Separate DNS servers also can enter here.
Optionally DNS, NTP server can be provided to the VPN clients from here.
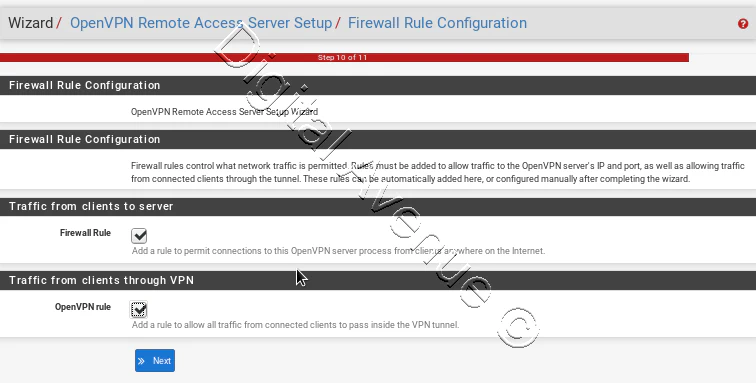
STEP 7:- Firewall Rule creation for OpnVPN
Traffic from client to server: - If this section enabled, OpenVPN wizard will automatically generate the necessary firewall rules to permit the incoming connection to Pfsense OpenVPN server from clients anywhere on the internet.
Traffic from clients through VPN:- If this connection enabled, OpenVPN wizard will automatically generate firewall rules which allow traffic from clients connected to the VPN to anywhere on the local network.

Finally finish the wizard.

STEP 8:- Create VPN Users with Certificates
If you selected the “local user access” option during the VPN wizard then users can be added through the pfSense user manger.
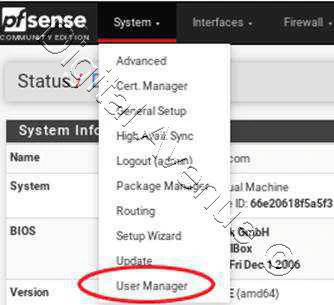
Create new user.
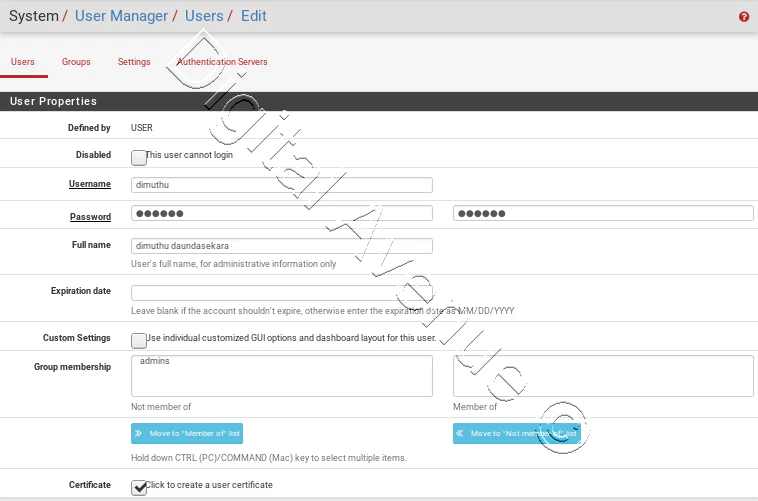
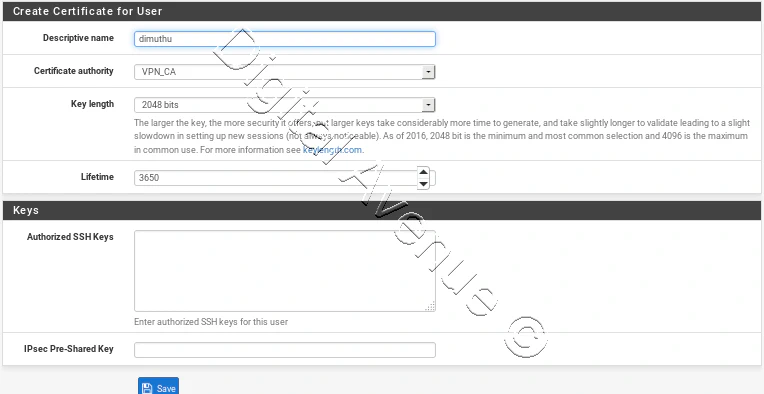

STEP 9:- Install OpnVPN Client Export Package
Install OpenVPN Client Export package using Pfsense package manager.
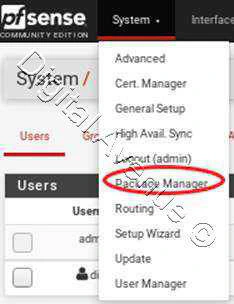

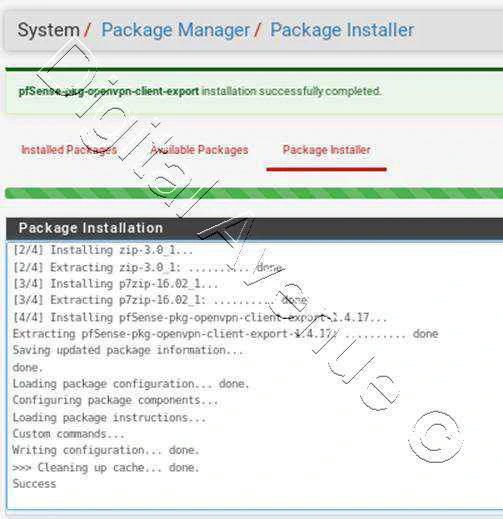
After the installation there will be a new tab named with “Client Export” in OpenVPN menu.

Modify “Hostname Resolution” field. By default this is set to the IP address of the interface running OpenVPN.
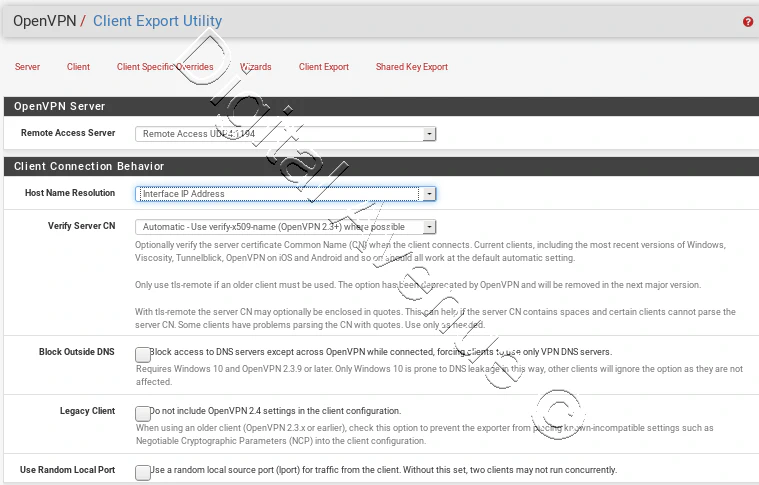
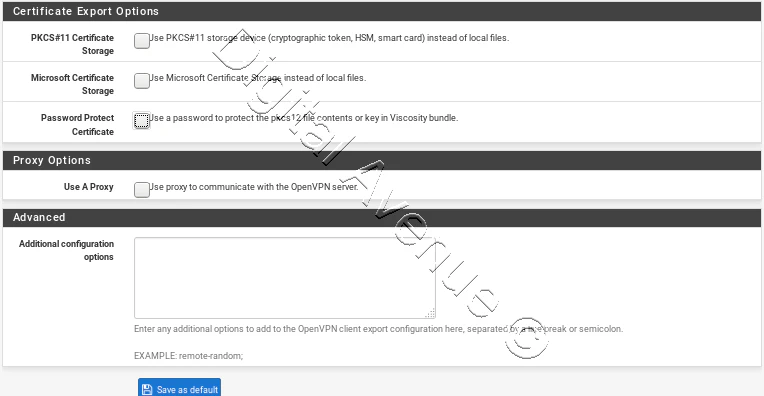
After any changes made, click the “Save as default” button to store the settings.
STEP 10:- Download the OpenVPN Client Packages.

Download and install OpenVPN client application.
https://openvpn.net/index.php/open-source/downloads.html
https://swupdate.openvpn.org/community/releases/openvpn-install-2.4.6-I602.exe
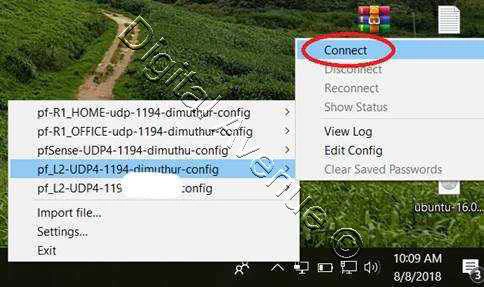
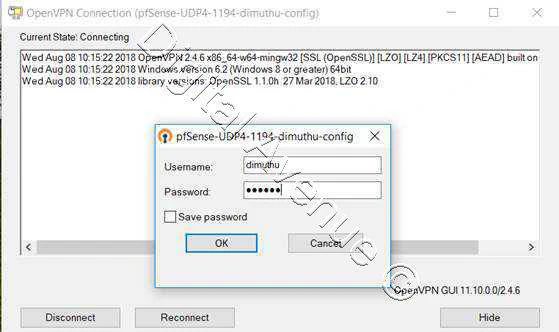
Install downloaded OpenVPN profile.
Deploy Production Grade Kubernetes Cluster on Azure AKS
Introduction This tutorial is intended to demonstrate how to setup your 1st Kubernetes cluster on Azure Kubernetes Services (AKS). This tutorial will cover up all the steps that you need to setup complete AKS cluster.
Getting Started With Docker - Quick Start Guide
Getting Started With Docker - Quick Start Guide Docker Engine Platform as a Service (PaaS) Cloud platform service. Allows you to manage its application and data.
How To Run Microsoft SQL Server On Kubernetes - Azure Kubernetes Service
Prerequisites: Azure CLI https://docs.microsoft.com/en-us/cli/azure/install-azure-cli 1. Run the Azure CLI with the az command. 1.1 Run the login command. az login Login in the browser with the azure account.
